US CitySlicker sixsixty's Ultimate Lomography DIY: Develop Your Own Film: Part 1

40

Come with us on a journey through space and time to partake in the ultimate DIY adventure: developing your own film. In part 1 we will cover C-41 color negative and the lomo fan favorite: cross processing.

I don’t know about you, but I’ve definitely seen a decline in places that develop film these days. You used to be able to go to your local drugstore and get some film developed cheap—not so much anymore. The only places I find to get my film developed are the speciality shops. Now, I highly recommend getting film done at these speciality shops like the lomo gallery stores. They do an amazing job. But, if you’re like me and shoot multiple rolls of film a week, there’s no way you can afford that. So let’s take our film photography hobby to the next level: let’s develop our own film. It’s quite easy, much more affordable, and it feels like you’re doing SCIENCE!

A few things you definitely need:
(I’m not going to link to anything, but all these items are easily found online still. I’m also going to list prices as they are today in the US).

- Universal Film Tank. $22 – I highly recommend getting the Paterson Super System 4 brand. The other brands that i’ve tried tend to leak.

To start off, get a tank that can do 2 rolls of 35mm or 1 roll of 120. Later, it’s worth getting a second tank that can do 3 rolls of 35mm or 2 rolls of 120.

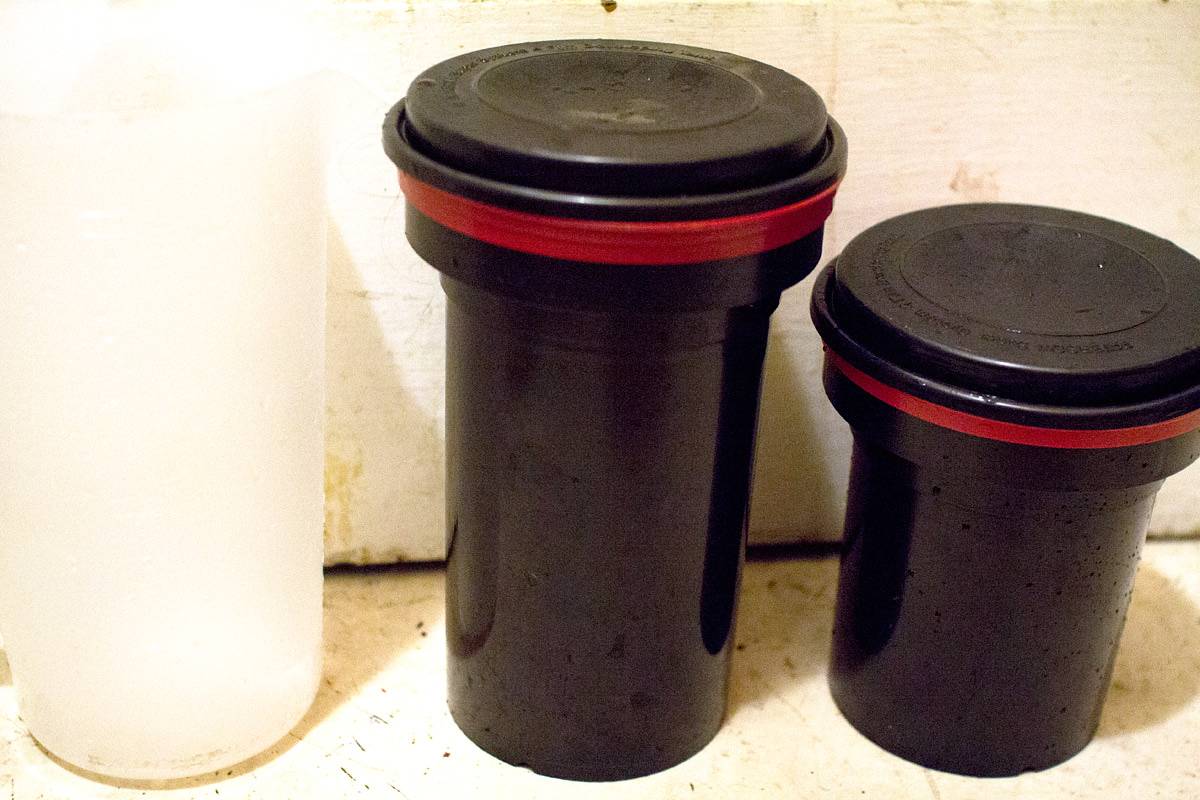
- 3 Containers to store the chemicals.

These should be 1 liter sized or 1 quart sized each. I have used some that are glass and some that are plastic. Get whatever you prefer or have around the house. Just make sure they seal well.

- 1 Large pitcher.

Get a cheap one from wherever. Plastic is fine. It helps if it has markings for 1 quart or 1 liter on it.

- Thermometer.

Get a cheap one. Just be sure you are able to read the individual degrees so you can tell when the chemicals get to 102 degrees exactly. I have tried a digital thermometer before, but those tend to get wet and go all wonky.

- C-41 Film Powder Processing Kit. $18

There are a few brands out there, sometimes they are called Press Kits. They have all the C-41 chemicals you need in one package. Some brands are Unicoor, Tetenal, and Arista. There are other C-41 methods and chemicals out there, but these press kits are the easiest to use and what we will cover here.

- Scissors to cut the film.

You should hopefully have this already.

- Spoon or something to mix chemicals with.

You could use a stick…but I would wash it first.

- Film Scanner.

So, this is the only expensive item you actually need. You can get one for under $100, a very decent one for under $200 and then for more professional features they can get a lot more expensive. Hopefully you already have a film scanner or if you can’t afford one, maybe you know a friend with one you can use. I highly recommend getting a scanner though, it opens up so many new opportunities with shooting film.

Misc items you don’t need but definitely help:

- Stop watch.

You can use whatever you have handy, phone, clock, whatever. A stop watch is nice though so you don’t accidentally drop your phone in the tub or spill chemicals on it.

- A funnel would be nice to get the chemicals back into the containers.

- Film Leader Retriever. $5

These come in really handy for getting film out of the 35mm reels. If you don’t have one of these just use a bottle opener to get your film out, but doing it with a film leader retriever makes things much neater.

First step in this process: get the film into the Tank.

Practice doing this in the light to see how it is done, but—and this is a big butt—when you do this for real, this has to be done in complete darkness or as close to as possible. I just go into my bathroom and close the door, then make sure no light is leaking in around the door frame (stick a towel in the cracks or use tape). The darker you can get it the better. They also make dark bags for doing this, but that cost money and we are being cheap here.

So again practice this in the light first. Get a junk roll of film, something you don’t care about throwing away. I used this piece of c**p C-41 B&W film for an example. Full instructions for this is also included with the tank, but the basics are:

- Pull a little bit of the film out and cut off the end.
- Pull more of the film out and start to feed it into the reel.
- Twist the reel back and forth until all the film is loaded.
- Cut off the end of the film.
- Put the reel in the tank and close the tank. it is now completely dark in there and you can turn the lights back on. Hopefully, no hanky-panky stuff went on in the dark…this is serious business.

Practice, Practice, Practice. Do this over and over again in the light until you can do it blindfolded. Then practice it in the dark too. Use 35mm and 120 to practice.

Next step: mixing the chemicals.

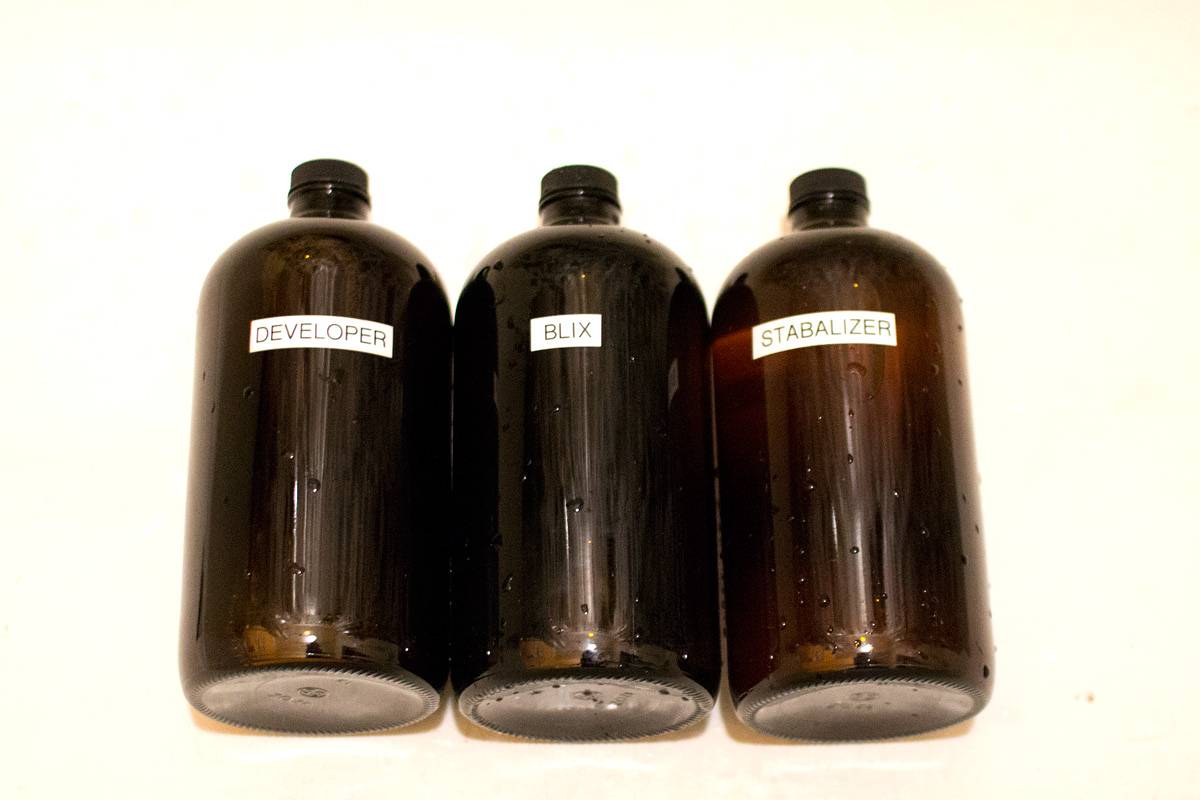
This is really easy to do, and the full instructions are included. Just warm up some water and pour it into the pitcher. Then add your chemicals as instructed and
mix them up. Put the mixed chemicals into the containers. But, be sure to label your containers!!!! You will end up with 3 bottles of chemicals, developer, blix (bleach+fixer), and stabilizer.

Next, we need to make sure the chemicals are at the right temperature. I used my bathtub for this, but if you have a nice big sink that can fill up with water (not dishes) you can use that too. To save water I use a plastic bin, so I don’t have to fill up my whole tup. Anyway, fill up whatever you got with hot hot water and put the developer and the blix in the water. The stabilizer doesn’t need to be warmed up. Then, put your thermometer into the developer. The goal is to get the developer to 102 degrees exactly.

Again, the full set of instructions are included with the chemicals, so just the basics here: One thing to note, I will list the times here for each step. During those times you need to agitate the tank. The basic instructions for that is every 30 seconds flip the tank upside down and back 4 times. It’s important not to over agitate the film, that can tend to make it come out over exposed, so just follow what it says.

- Fill up the tank with 102 degree water. 1 min. dump it out.
- Fill up the tank with 102 degree developer. 3:30 min. Dump it back into the developer container. (we save this)
- Fill up the tank with 102 degree-ish water and dump it right out.
- Fill up the tank with 102 degree-ish blix. 6:30 min. Dump it back into the blix container.
- At this point we can open the tank. Rinse the tank under 102 degree-ish running water for 3 min.
- Fill up the tank with room temp stabilizer. 1 min. Dump it back into the stabilizer container.

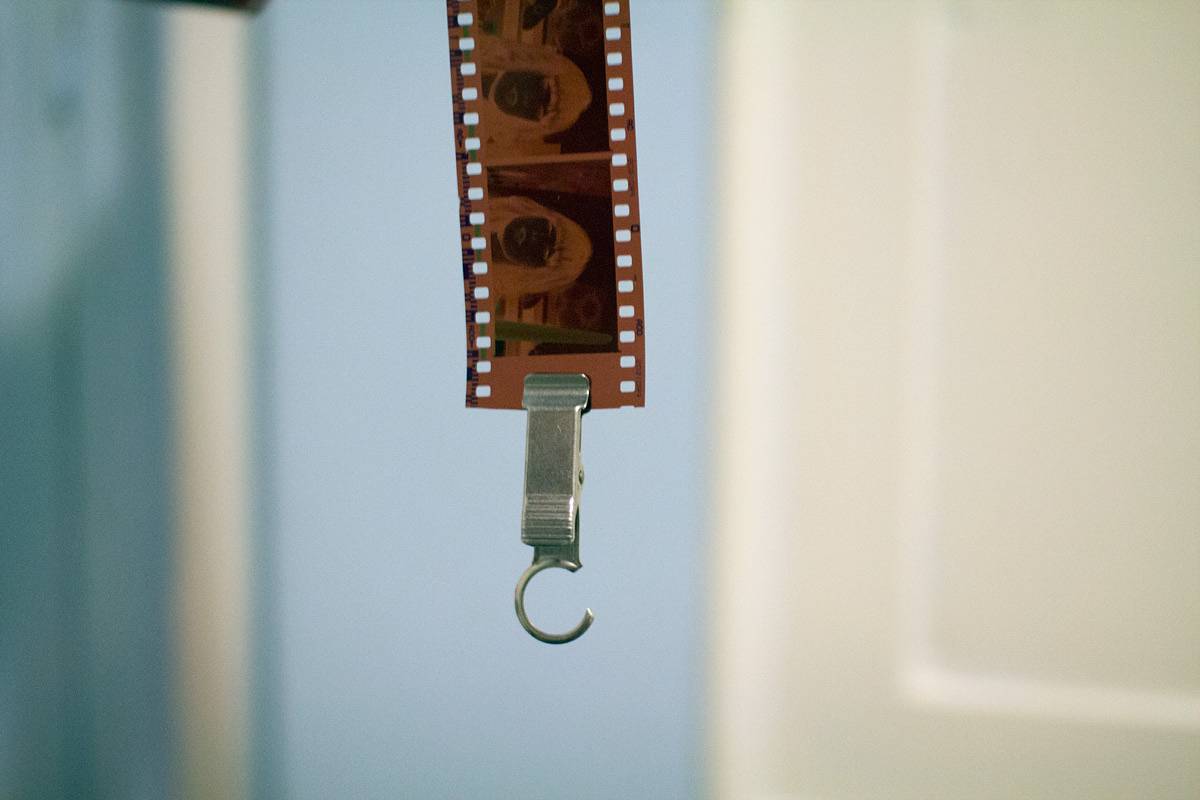
-Squeegee the film with either your fingers or a film squeegee or a sponge, and then hang them up on hangers with clips.

- Let them dry for a few hours.
- Cut them up and put them into sleeves (or not).
- I like to put them in a heavy book and let them sit for a few more hours. this helps straighten them out.

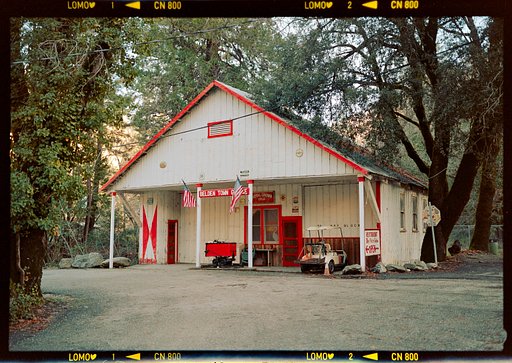
Thats it! That’s it? Yup, you know have developed film. You can then go scan them at your leisure. We won’t be going over scanning here, but there are plenty of good tutorials for that. They say you can reuse these chemicals for up to 8 rolls, however I’ve gotten much much more. Some people say you could even do 40+ rolls with a single set of chemicals, but the fresher the chemicals the more consistant the results.

written by sixsixty on 2012-08-23 #gear #tutorials #film #diy #color-negative #c-41 #science #lab-rat #tipster #development #xpro #develop #film-processing #the-shooting-gallery-series

40 Comments

  1. trw
    trw ·

    Great article! Thanks for the step by step information. I may even get up the courage to try it one of these days.

  2. schemerel
    schemerel ·

    just go for it ! developping my own film and buying a scanner are probably the best decisions of my lomographic life. I can reccomend jobotanks as well, when you close them the right way, they don't leak (learnt that the hard way) but if you close them wrong sometimes you get lovely light leaks, I actualy might do this on purpose in the future. great article !

  3. ricoinbrooklyn
    ricoinbrooklyn ·

    Great article!

  4. letsgetfunkyy
    letsgetfunkyy ·

    great article! But i'm still afraid to try this out.

  5. sixsixty
    sixsixty ·

    @trw Definitely give this a try, this makes lomography soo much more hands on! I would say the only reason not to is if you still can find places that do really really cheap developing only, that do a decent job. Otherwise this is much cheaper, faster, and science-y fun!

  6. sixsixty
    sixsixty ·

    @schemerel "just go for it ! developping my own film and buying a scanner are probably the best decisions of my lomographic life." I totally agree!!!!! I really want to one day invest in one of those automatic jobo developers. A friend of mine has one and I'm totally jealous.

  7. sixsixty
    sixsixty ·

    @letsgetfunkyy Start with a scanner and just get your film developed when you take it in. See if you like that and then work your way up!

  8. letsgetfunkyy
    letsgetfunkyy ·

    @sixsixty: I already have my own flatbedscanner which I like a lot! And somewhere deep inside of me I'm dying to try to develop my own film, but for now, I trust the local store more than I trust myself with the chemicals. I would die if my beloved film got ruined by my own fault..

  9. schemerel
    schemerel ·

    @sixsixty I own a jobo cpe2 and I adore it. When I found out such marvelous wonder of the olden, analogue days existed I immediately obsessively started to look for one on second hand sites. I was lucky enough to find one for a good price, from an old man who used to be a semi-professional photographer and for some extra money I got a lot of expired film, a negative drying closet type thing, a coldtimer, black& white printing paper, etc.... all that for €100 euro's

  10. schemerel
    schemerel ·

    @letsgetfunky just buy a small c-41 kit and try it with some negatives you're not extremely attached to. thats what I did. Also the fact that things can go wrong makes it more magical for me. It extends the whole film experience a little further. For me it's a good lesson in mindfullness. To accept that things can go wrong.
    that and nothing beats the feeling you get when you take out that fresh developed negative and marvel at the beauty and think 'I made this'

  11. schemerel
    schemerel ·

    @letsgetfunky just buy a small c-41 kit and try it with some negatives you're not extremely attached to. thats what I did. Also the fact that things can go wrong makes it more magical for me. It extends the whole film experience a little further. For me it's a good lesson in mindfullness. To accept that things can go wrong.
    that and nothing beats the feeling you get when you take out that fresh developed negative and marvel at the beauty and think 'I made this'

  12. schemerel
    schemerel ·

    whoops sorry

  13. bbthom
    bbthom ·

    I would start with developing black-and-white film only, it's much easier

  14. sixsixty
    sixsixty ·

    @bbthorn That's what a lot of people say. But, I actually find c-41 much easier to get a grasp on. First off it's just 1 kit, you don't have to go and find what developer, stop, fix, etc you need. And even more simpler, you don't have to go find developing times. No hunting down how long what film takes in what developer and better yet, you can mix and match different films, iso, slide/neg, all in the same c-41 solution. That sounds pretty easy to me to start! I'm all for more people developing whatever they shoot!

  15. deja-mew
    deja-mew ·

    thanks so much, once again, for a great article. ;D I have been dying to get started on developing at home! I think that maybe this article will give me the boost i need to go ahead with it before the year's end. there is a local spot i can get process-only cn rolls done for about 2.73, but i can't cross process there.

  16. deja-mew
    deja-mew ·

    oh, my question, though, is how easy is it to get to 102 degree water?

  17. deja-mew
    deja-mew ·

    where do you recommend getting the developing powder kit?

  18. sixsixty
    sixsixty ·

    @deja-mew I just fill up a bin in my bathtub with hot water (as hot as it goes) and let the bottles of chemicals soak in that for usually about 5-10 minutes. I keep the thermometer in there and it's pretty easy to read when it hits 102 degrees. Then I take them out and use them right when it hits 102. I get my chemicals online, i've used both B&H Photo and FreestlyePhoto. I also heard calumet is good.
    As for cross processing, be warned scanning that type of film can take some time. I usually have to play around with 2 or 3 different scanning software depending on what type of film it is. It's fun though.

  19. sixsixty
  20. peacocksky
    peacocksky ·

    thanks so much for this article.

  21. bbthom
    bbthom ·

    @sixsixty c-41 seems a lot easier than I thought, I think I'm going to try it :)

  22. davideji
    davideji ·

    C-41 is actually just as easy as BW, and if I can do it, anyone can!

  23. tregare
    tregare ·

    Get 2 sets of bottles, one for fresh, one for used chems. when you are done with each batch of fresh, dump it into the used bottle. if you have a nitrogen source, you can flush the air out of the bottle with low pressure nitrogen, it will make the chems last longer (or pull a vacuum on the bottle, either way). C-41 sounds a lot like b&w, 3 chemicals to do it with...

    When you put the water in the first time, you want to tap gently a few times to get bubbles off the film, you are rinsing the film and emulsion and also softening it slightly to help the developer do it's job. if you can use purified water heater to remp it is better, if you live somewhere with hard water then make sure to use bottled purified for the initial water bath and rinses.

  24. dimmedshadow
    dimmedshadow ·

    Best article on this subject :D thank you so much, ill most definitely will be trying this at some point :)

  25. flor3nce
    flor3nce ·

    This is a great article, thank you! I've been wanting to develop my own film for a little while now, just need to find a place where I can buy the chemicals in Holland.

  26. nigelk
    nigelk ·

    @sixsixty I find it easier to spool 35mm film onto the reels if I cut the left and right front edges of the film. Nothing major, just a little 45 degree cut at the sprocket holes.

  27. doctorsprocket
    doctorsprocket ·

    gotta sprocket rocket, right? dude this is probebly (i'm austrian i think i havn't written it right but f**k it man) the best tutorial on lomo.com i really enjoyed reading it. i think i also start developing on my own! do you think unicolor is better than tetenal colortec? looking forward to an answer

  28. sixsixty
    sixsixty ·

    @doctorsprocket I've tried the tetenal and unicolor 3 bath powder kits (also the arista) and I find they all performed the same. So I tend to just go for the cheaper one at the time. I havent tried the tetenal colortec liquid kit yet, it's on my list with the rollei one too. I'm assuming they will all perform pretty much the same. Definitely give developing a shot, it's really easy and gets you closer to your images.

  29. doctorsprocket
    doctorsprocket ·

    thanks for the fast answer

  30. dutchninjapanda
    dutchninjapanda ·

    Wow! Thank you, so much; I feared I would have to stay with only BW because I'm only a first year photography student, but I ordered a Diana F+ last night, anyways because I felt like it would still be fun to explore analogue photography. Learning that developing some awesome color shots is this easy only makes me even more sure that my purchase was completely worthwhile; I cannot wait to try out this development techninque!

  31. jerryblack
    jerryblack ·

    hi , how many film can i develop with the C-41 Film Powder ? anyone knows?

  32. jerryblack
    jerryblack ·

    how many times can i reuse the same developer?

  33. sixsixty
    sixsixty ·

    @jerryblack the chemicals are rated for 8 rolls at the listed developing times. I have gone as far as 20 rolls with the same set of chemicals. I have heard people do 40+ rolls with the same set of chemicals. The more you do, the longer the developing time is and the quality starts to vary.

  34. brassring
    brassring ·

    When will we see Part 2?

  35. sixsixty
    sixsixty ·

    @brassring part 2 will be E-6 or B&W. Not sure when we'll see it. someday. But to be honest the process is almost exactly the same as C-41. If you have any questions about E-6 or B&W let me know and I'll see if I can answer them.

  36. danomagico
    danomagico ·

    Thank you very much for this wonderful tutorial ! I was planning to buy a Smena on eBay but when I saw the developing prices at my local lab, I thought it'd be way too expensive... But when developing my film on my own it looks a lot cheaper !

  37. eris
    eris ·

    Anyone have input on doing this with a bag? My bathroom has a window in it.
    I am wondering if it is possible to use a black paper garbage bag sealed on one end, attached to rubber gloves through holes sealed with duct tape, and do the whole thing in the bag without looking. Then rip open the bag when it is done. Anyone who has ever done development: if you practice a lot first, is this plausible?

  38. eris
    eris ·

    My prev. comment doesn't make a lot of sense. I basically don't know how many chemicals you have to do in the dark. If it is too many then the bag idea will not work!

  39. eris
    eris ·

    Looking at it again it sounds like only the first immersion of film in chemicals need be in the dark. In this case the supplies should all fit in a plastic garbage bag, sealed with tape, with rubber gloves attached by duct tape.

  40. sixsixty
    sixsixty ·

    @eris I would be worried that the film would stick to itself and the inside of the bag. This would cause those parts of the film to be underdeveloped and the other parts possible over developed. It's Lomo so any experiment is worth a shot. Let us know how it goes.

More Interesting Articles