Lomography Tutorials: Adjustable Fishtail Camera Strap
1 8 Share TweetUp for another DIY challenge? Well, we've got you covered! Here's another variation of an adjustable camera strap featuring the fishtail pattern. It's easy and fun to do. Time to get crafty!

Here are the materials you'll need:

- 7 feet (213.36 cm) of 550 paracord for your working strands (army green)
- 3 feet (91.44 cm) of 550 paracord for your core strands (brown)
- a cigarette lighter
- a pair of scissors
- a small key ring
- ruler/tape measure
Let's begin with the tutorial!
1. Take the shorter length of paracord and fold it in half.

This will serve as your core strands.
2. Take your longer length of paracord, fold it in half, and place it behind your core strands.
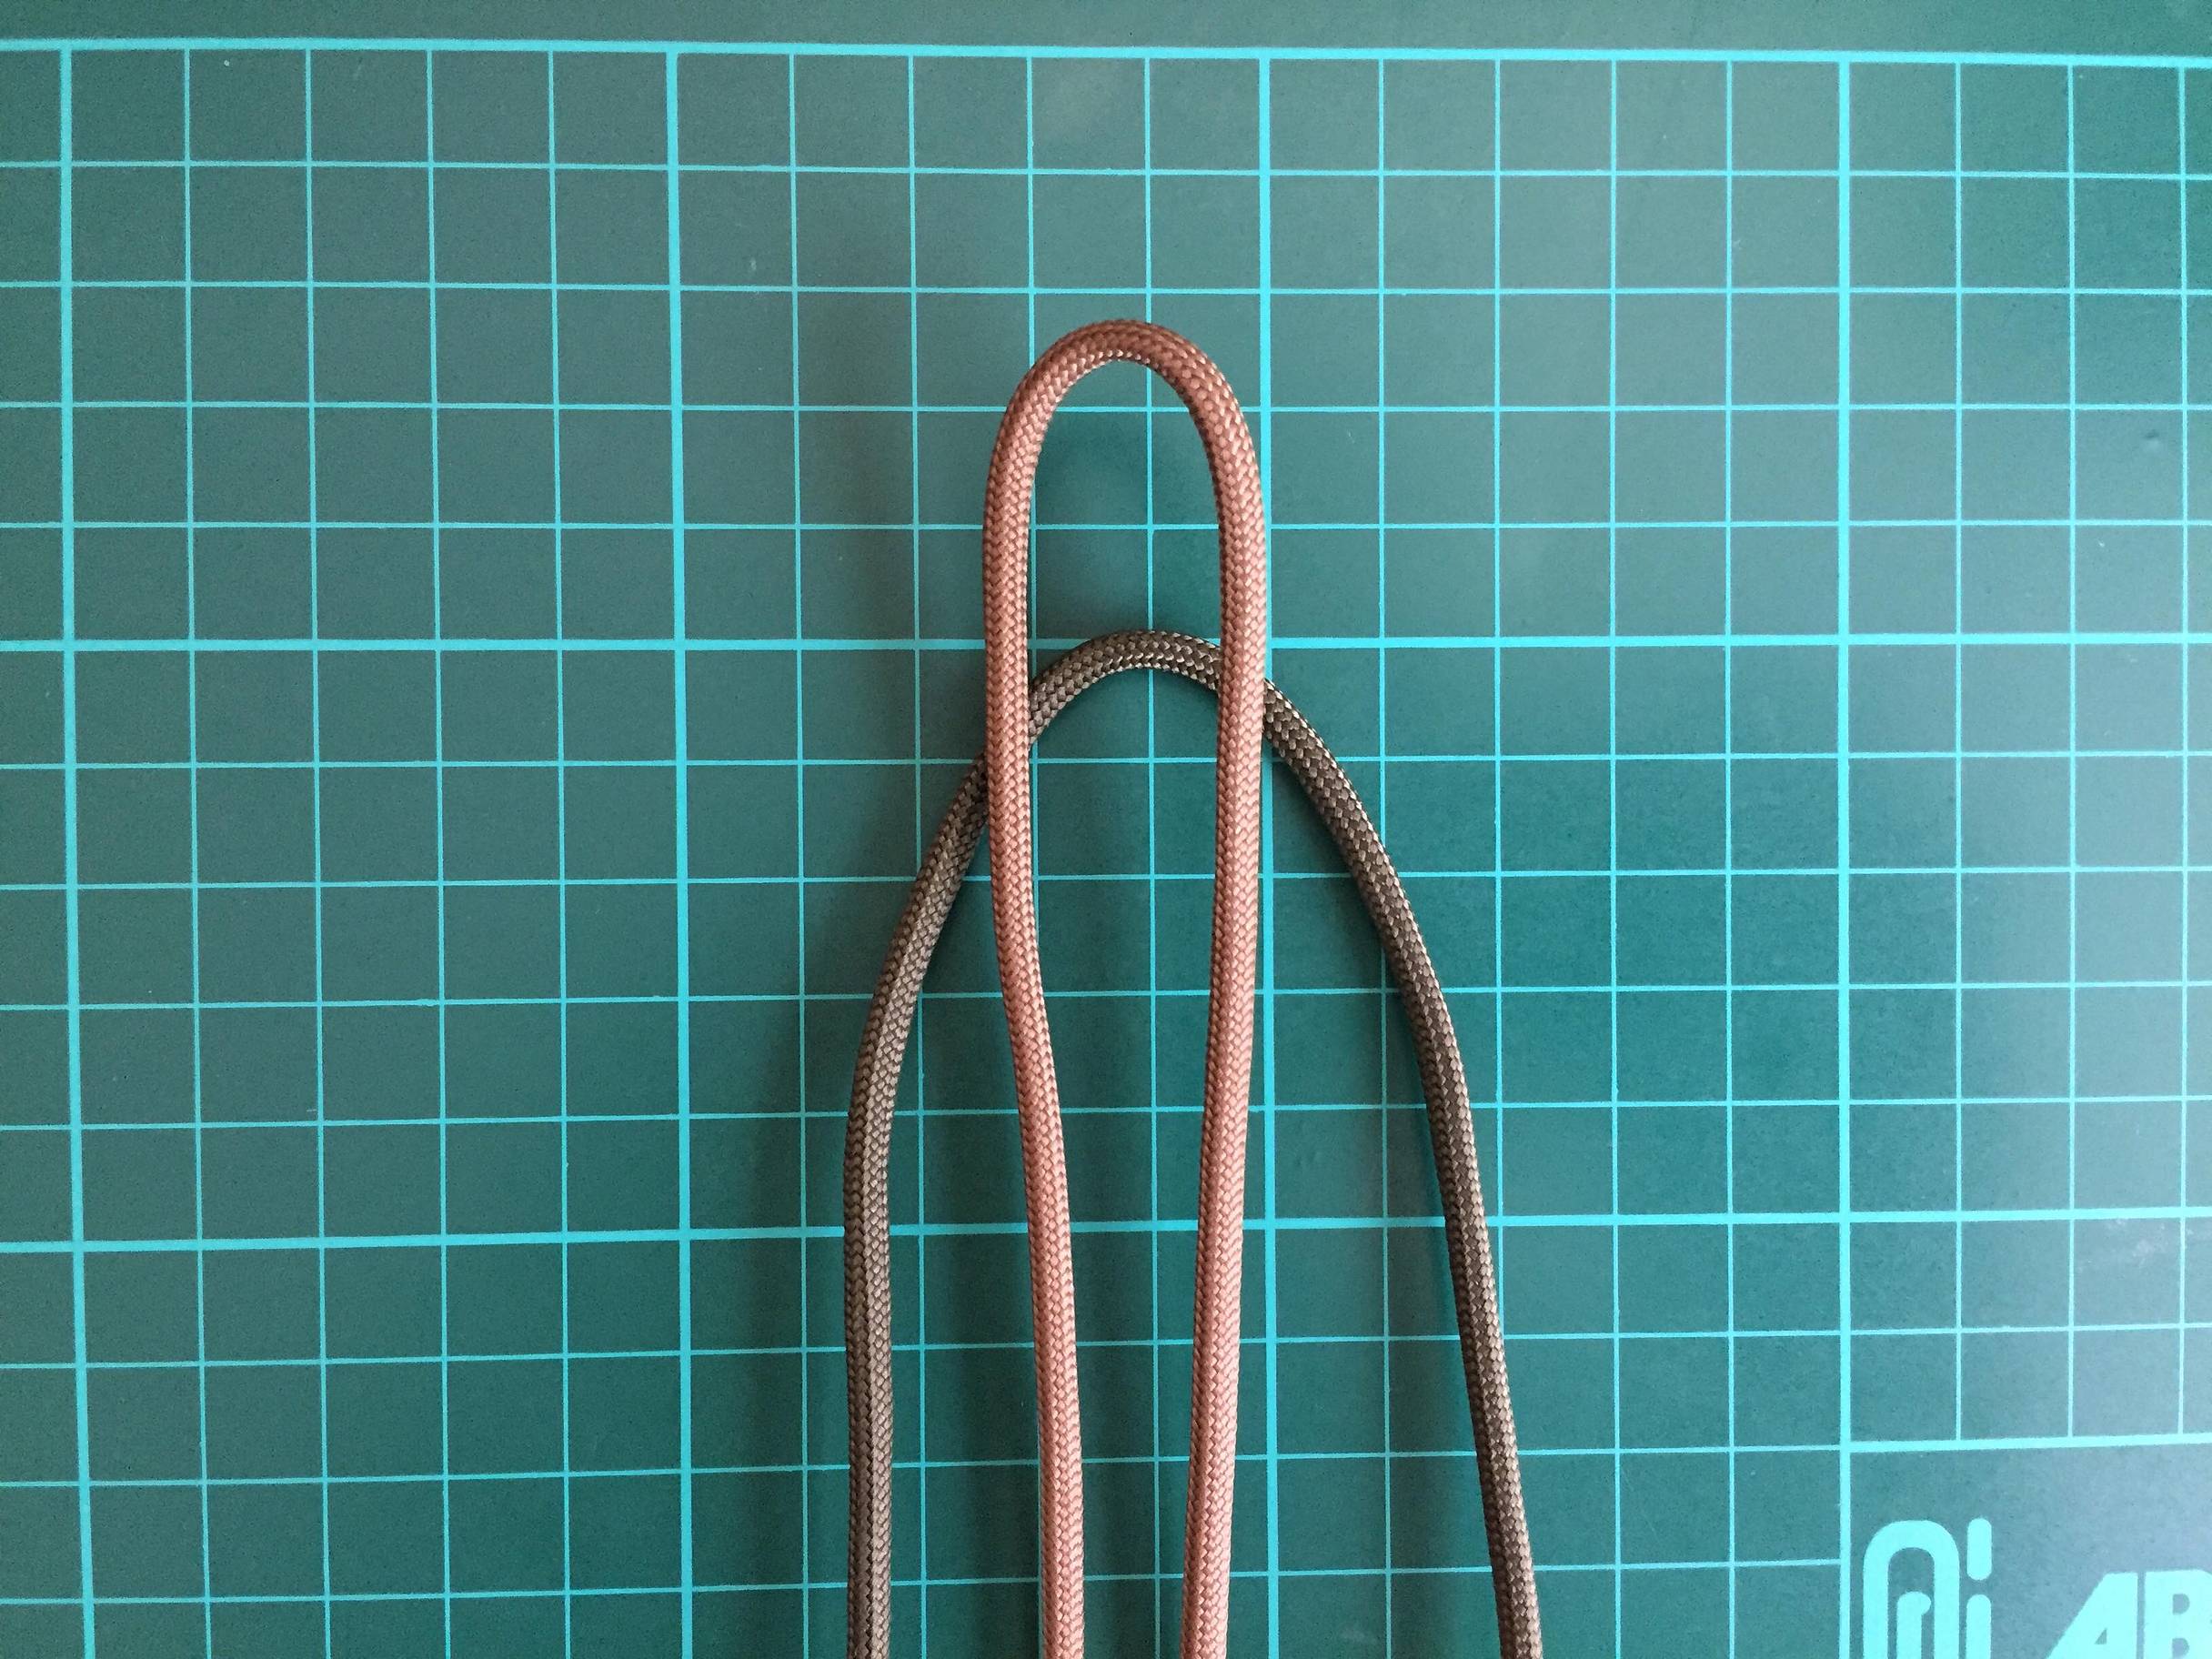
Doing this will allow you to start the weave.
3. To start the weave, take your left working strand and insert it your two core strands.
After that, do the same with your right strand only in the opposite direction. You just made your first fishtail weave! Now, simply repeat the process: left strand in, then right strand in.
4. Continue weaving until you get to your desired strap length.

If you’ve weaved correctly, this is what the fishtail pattern looks like.
5. Time to lock the weave.

Take your right working strand and insert it into your core strands and pull it to the right. Take the end of your right working strand and thread it into the loop you just created. Pull tight to close it. Do the same with your left working strand to finish locking the weave.
6. Take your core strands and thread them into the loop you created at the beginning of the weaving process.

This will serve as the adjustable part of your strap. You can push the weave up into the loop to tighten it.
7. Now it's time to attach the key ring to your strap.
To do this, you need to take the right strand, pull it to the right and thread behind it to make a loop. Then take the same strand and thread it into the loop you just made. Pull on the ends of your paracord to tighten it.
8. To finish attaching the strap to your key ring, repeat the same steps only this time with your left strand.

You should have something that looks like this.
9. You're almost done.

The only thing left to do is to snip and singe the excess paracord using your scissors and lighter.

You just completed a new camera strap for your trusty shooter. Pair it with your favorite instant camera or SLR and you're all set. You can also add a whipping knot to the attachment end of your strap using the excess paracord as an extra step. We hope you try this one out but if you need more options, feel free to check out our Online Shop for a wide selection of camera straps.
Let us know in the comments section below if you'd like to see more tutorials like this. Share your finished projects if you tried making one, too!
written by cheeo on 2018-05-29 #tutorials #diy #craft #camera-wrist-strap #paracord










One Comment