Developing Negatives for Beginners
8 81 Share TweetAnalogue photography is great fun, but the costs can soon ramp up with films, processing, and printing without knowing how your first few sets of photos will come out. When I was given a Diana F+ camera for my birthday, I immediately knew that I was going to end up learning how to develop my own negatives. After a quick scout round Google and eBay, I knew that I only needed a kit for B&W processing (colour processing is more complex) and, after the initial outlay, you can dilute chemicals quite a lot and get your processing costs right down. Here's a quick kit list:
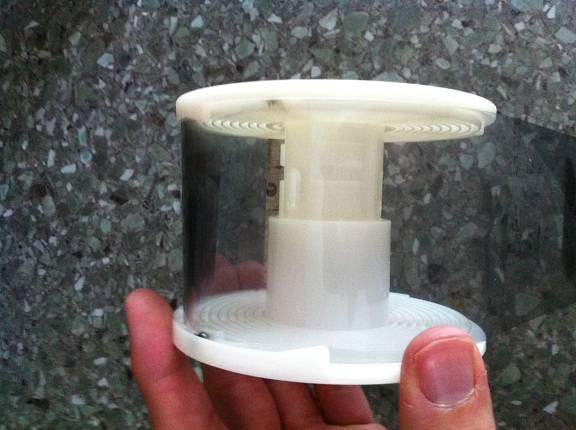
- Developing tank - I would look for a 'Universal' tank, so that you can develop 120 or 35mm film at your leisure. You will definitely need a universal tank if you are going to develop 120 film (I couldn't find any 120 only tanks, so assume this is the case). I picked up an old Paterson tank for about £10 on eBay.
- A timer - Something with a dial so that you can see each minute passing like a stopwatch/phone timer.
- Chemicals - There are two chemicals that you will definitely need, plus a couple more that can be nice. Developer is obviously an essential - so far I've used Ilford Microphen and have some ID11 lined up for my next roll of film. The only other essential chemical is Fixer - again I've got some from Ilford (Rapid Fixer). If you're in the UK, you can order these into your local Jessops store, or check out West End Cameras' eBay store for free P&P.
The other two chemicals you can use are: stop bath (if you're going to make your own prints as well, you will definitely need this, but it can be made from vinegar and water) and a wetting agent. You can instead just rinse your negatives thoroughly between developer and fixer and avoid stop bath and wetting agent can be replaced with careful use of washing up liquid.


Chemical Prep
Some chemicals come as a stock solution already made up that you can then dilute to working strengths, others come as a powder. Make sure you follow the manufacturer's instructions to prepare them and store them in clearly marked bottles away from food/drinks. You can find working solutions for nearly every film on the Massive Dev Chart (look it up on Google) or some are right here on the Lomography site for Lomography films like Earl Grey B&W. NB - processing chemicals are not good for you, so ensure you use measuring jugs, etc. that aren't used for preparation of food and there is no food in your workspace.
You will want to dilute your chemicals in advance - dilutions are generally written in an x+y format, say 1 part stock chemical + 1 part water - the more you dilute the chemicals, the longer developing time you will need as per the listings on the Dev Chart. The amount of liquid you will need is generally on the bottom of your tank - you'll want to mix your diluted chemicals up to that amount.
The Developing Process
1. Find yourself a COMPLETELY light-tight place to load your film into the developing tank. It really has to be absolutely pitch black. I use our bathroom, which has no windows and obviously has a sink for dealing with chemicals, etc. You can do the steps after the film is in the tank in, say, a kitchen as the tank should be light tight when sealed - I've certainly had no issues and it is a LOT easier to work with chemicals and timers in a lit area.


2. Before the lights go out - arrange your workspace thoroughly. Your developing tank will consist of a few components - there will be a top cap, a lightproof lid with seal, (possibly) an agitation stick, a reel for your film (make sure it's set to the right film size if it's universal) and the bottom structure of the tank (this may have a central spindle permanently attached or removable and a clip to hold the reel in place). I lay this all out in order of use from left to right as I find that the best way of doing things. If you are using 35mm film, you will need a bottle opener to get at your film if the end was wound into the canister and some scissors (more on this later). If you are using 120 film, you shouldn't need any additional tools to prepare your film for the tank, you just need to pull the tape holding the backing paper off at the other end of the spindle.
3. LIGHTS OUT. All the steps following are now in the dark, so make sure you know where everything is! Lots of people recommend doing the next step with a wasted film in the light so you can get the hang of it. I was being cheap and just did it the first time with an exposed film in the dark and didn't have any trouble, but your mileage may vary - definitely don't do it for the first time with a roll that has Very Important Photos on it.
35mm
Open up your 35mm canister with the bottle opener exactly as if you were opening a bottle, extract the film spool and find the end. You should snip off the tapered end of this as that will prevent you from loading it into the reel easily. When you get to the end of loading, you will also have to snip the other end of the film from the spindle.
120
Peel the tape off the end of the roll and start to unspool it, you will soon find the edge of the actual film itself. I like to fully unravel the film and detach it from the backing paper (it will be held on by masking tape). I then fold the masking tape over the end of the film to make an easier edge for loading into the reel.
Whether using 35mm or 120 film, make sure you handle it by the edges and try to avoid letting the film drop onto the floor etc.
4. Let's get reel. Your reel will have an obvious entry point for your film with two small ball bearings embedded into the sides. These bearings grip the film and help you to load it onto the reel. Hold the reel in one hand with the entry slots facing you and the two ball bearings parallel (maybe practice how this looks/feels in the light!) Gently slide the film into the slots before the bearings and keep sliding it past them. Once you can feel the film has engaged and is securely held, grab the reel with both hands slowly rotate one side of it away from you and then back towards you. You will notice that the film is now being taken up by the reel automatically. Slowly repeat this until the film is fully into the reel. If you make a mistake, you can gently pull the reel apart a bit and unravel the film.
5. Now place the reel into the tank, threading it over the central spindle. If you have a clip to hold it in place on the spindle, now is the time to put it on there too. Next up is the seal around the tank lid if you have one, and screw on the lid itself. Your tank should now be light proof if it has been set up correctly. You can now either add your chemicals or pop the lid on and take it to your 'wet' area.


6. Chemical time - you'll want some light for this. Add your developing chemical into the top of the tank, pop on the lid (tight) and start your timer. Bang the tank on a work surface once or twice to dispel air bubbles and then start inverting the tank - literally turn it upside down and then back slowly several times. Do this for the full first 30 seconds. As each minute passes, you need to do this for 10 seconds. After each set of inversions, you will need to give the tank a tap to dispel air bubbles settling on the film. This is all to ensure that fresh developer chemicals are in contact with the film itself, which gets used up very quickly.
7. As you get to the last few seconds of your developing time, you should remove the cap and prepare to tip out the chemicals - the idea is to have all the chemicals out of the tank as close to the timer reaching 0 as possible. Once you have tipped them out, flush the tank with stop bath or water. If using water, you should flush the tank at least five times.
8. Next, pour your diluted fixer into the tank and start the timer for the manufacturer's suggested time - for Ilford Rapid Fixer, I prefer 5 minutes (partly as I use fixer more than once). Fixing is important to do for plenty of time as this is what will give your negatives longevity. Again, you need to agitate/invert/tap the tank for the first 30 seconds and then 10 seconds each minute. At the end of the alloted time, again pour out your chemicals.
9. You now need to flush the film fully. The film is now light safe, so you can remove the lid to do this. I personally fill the tank and empty it about 10 times, but others recommend just leaving it under a running tap for 5 minutes. As you reach the end of the negative washing, you can add the wetting agent or a drop of washing up liquid. You don't want to wash this off.
10. That's pretty much it! Just hang your negatives up somewhere clean and dust free for it to dry. I use a pair of clothes pegs at either end of the film - one at the bottom to weight it down to avoid it curling up.
Once it's dry, you can scan your negatives yourself, take them elsewhere for scanning and printing, or even make your own prints...


Lomography's Earl Grey is an exquisite black and white 35mm ISO 100 film that will surely give your shots an extra dose of style and class. Whether you’re taking landscapes or portraits, you will get jaw-dropping results with Earl Grey super-fine grain and wide tonal range. See our selection of Lomography films here.
written by onescoop on 2011-10-14 #gear #tutorials #diy #black-and-white #developing #negatives #lab-rat #tipster #development #processing #film-processing


8 Comments