How to do Easy Multiple Exposures with your Classic LC-A!
20 48 Share TweetYou haven’t got the money for an LC-A+ or are just loving your old LC-A too much to replace it? But you want to make awesome MX Shots, too? Then I’ve got the perfect solution for you!


I love my classic LC-A, but ever since I saw some amazing MX shots in the community I was a bit upset that it wouldn’t be possible for me to try this, too. After this problem bugged me quite a long time I started a little research on the web and seemed to have found two solutions to my problem:
- Pressing down the little rewind button while advancing the film
- Cutting up the bottom of your LC-A to make place for a DIY MX button
As you might guess, none of these “solutions” were actually a solution for me. Pressing down the little rewind Button isn’t very accurate because sometimes the film is moving a bit, and it’s not very convenient either.
And cutting up my beloved LC-A just because of the lack of MX possibility? Never! I didn’t like the idea of damaging my poor little LC-A and doing irreversible changes to it. Also I think that there would be a lot of dust coming through that big hole in the bottom which could affect it’s functionality in the long term use.
So I sat down and came up with my own solution! Luckily I had an old beat up LC-A to test things before I tried it with my good one.
Warning! Of course I can not guarantee you that it won’t do any harm to your camera! Everyone who tries what I’m going to show, is doing it at his own risk. I won’t come up for any possible damage that you could do to your camera by trying this.
Before you start: Read the whole tutorial very carefully! It will help you a lot!
So, what are we waiting for? Let’s get started!
h2.What you will need:
- Tweezers (I would recommend them strongly!)
- A really small screwdriver which fits the LC-A screws
- Of course: your LC-A
- A small hand drill (non electric) with about 1-1,5mm diameter
- extra strong thread (call it what you want but be sure enough that it is strong and not the “fuzzy” type of string your t-shirt is made of!)
Here is what I used:


We start by drilling a small hole. I tried a few locations and this one works perfect for me. So be very careful by doing this! You want the hole to be exactly there where it is in the picture! If you look through the whole tutorial before trying, you will get a better impression on where the hole should be. Also it should be very straight and clean. Be concentrated and don’t rush!

At some point you will recognize that turning the drill gets a bit easier. Stop drilling, you’re far enough. So far, so good.
Now turn your LC-A over and use the small screwdriver to unscrew the three screws. Store them somewhere safe.

Detach the bottom plate and open the back of your LC-A. Use the screwdriver or something sharp to clean the hole from the plastic stuff which remains. It could damage the string you want to put later on through there:

But before we pull the string through there, put your camera to the side and take your bottom plate. You have to clean this hole from remaining plastic parts, too.
Now take a long piece of string. I took about 20cm, feel free to take more! Trust me, enough string will make it much easier. Now we want to make us a nice loop! Grab the string right in the middle and let the two ends hang down. Now put the string (loop-side first) through the hole in the bottom plate. I know it’s a bit fiddly, but you’ll get the hang of it! ;)

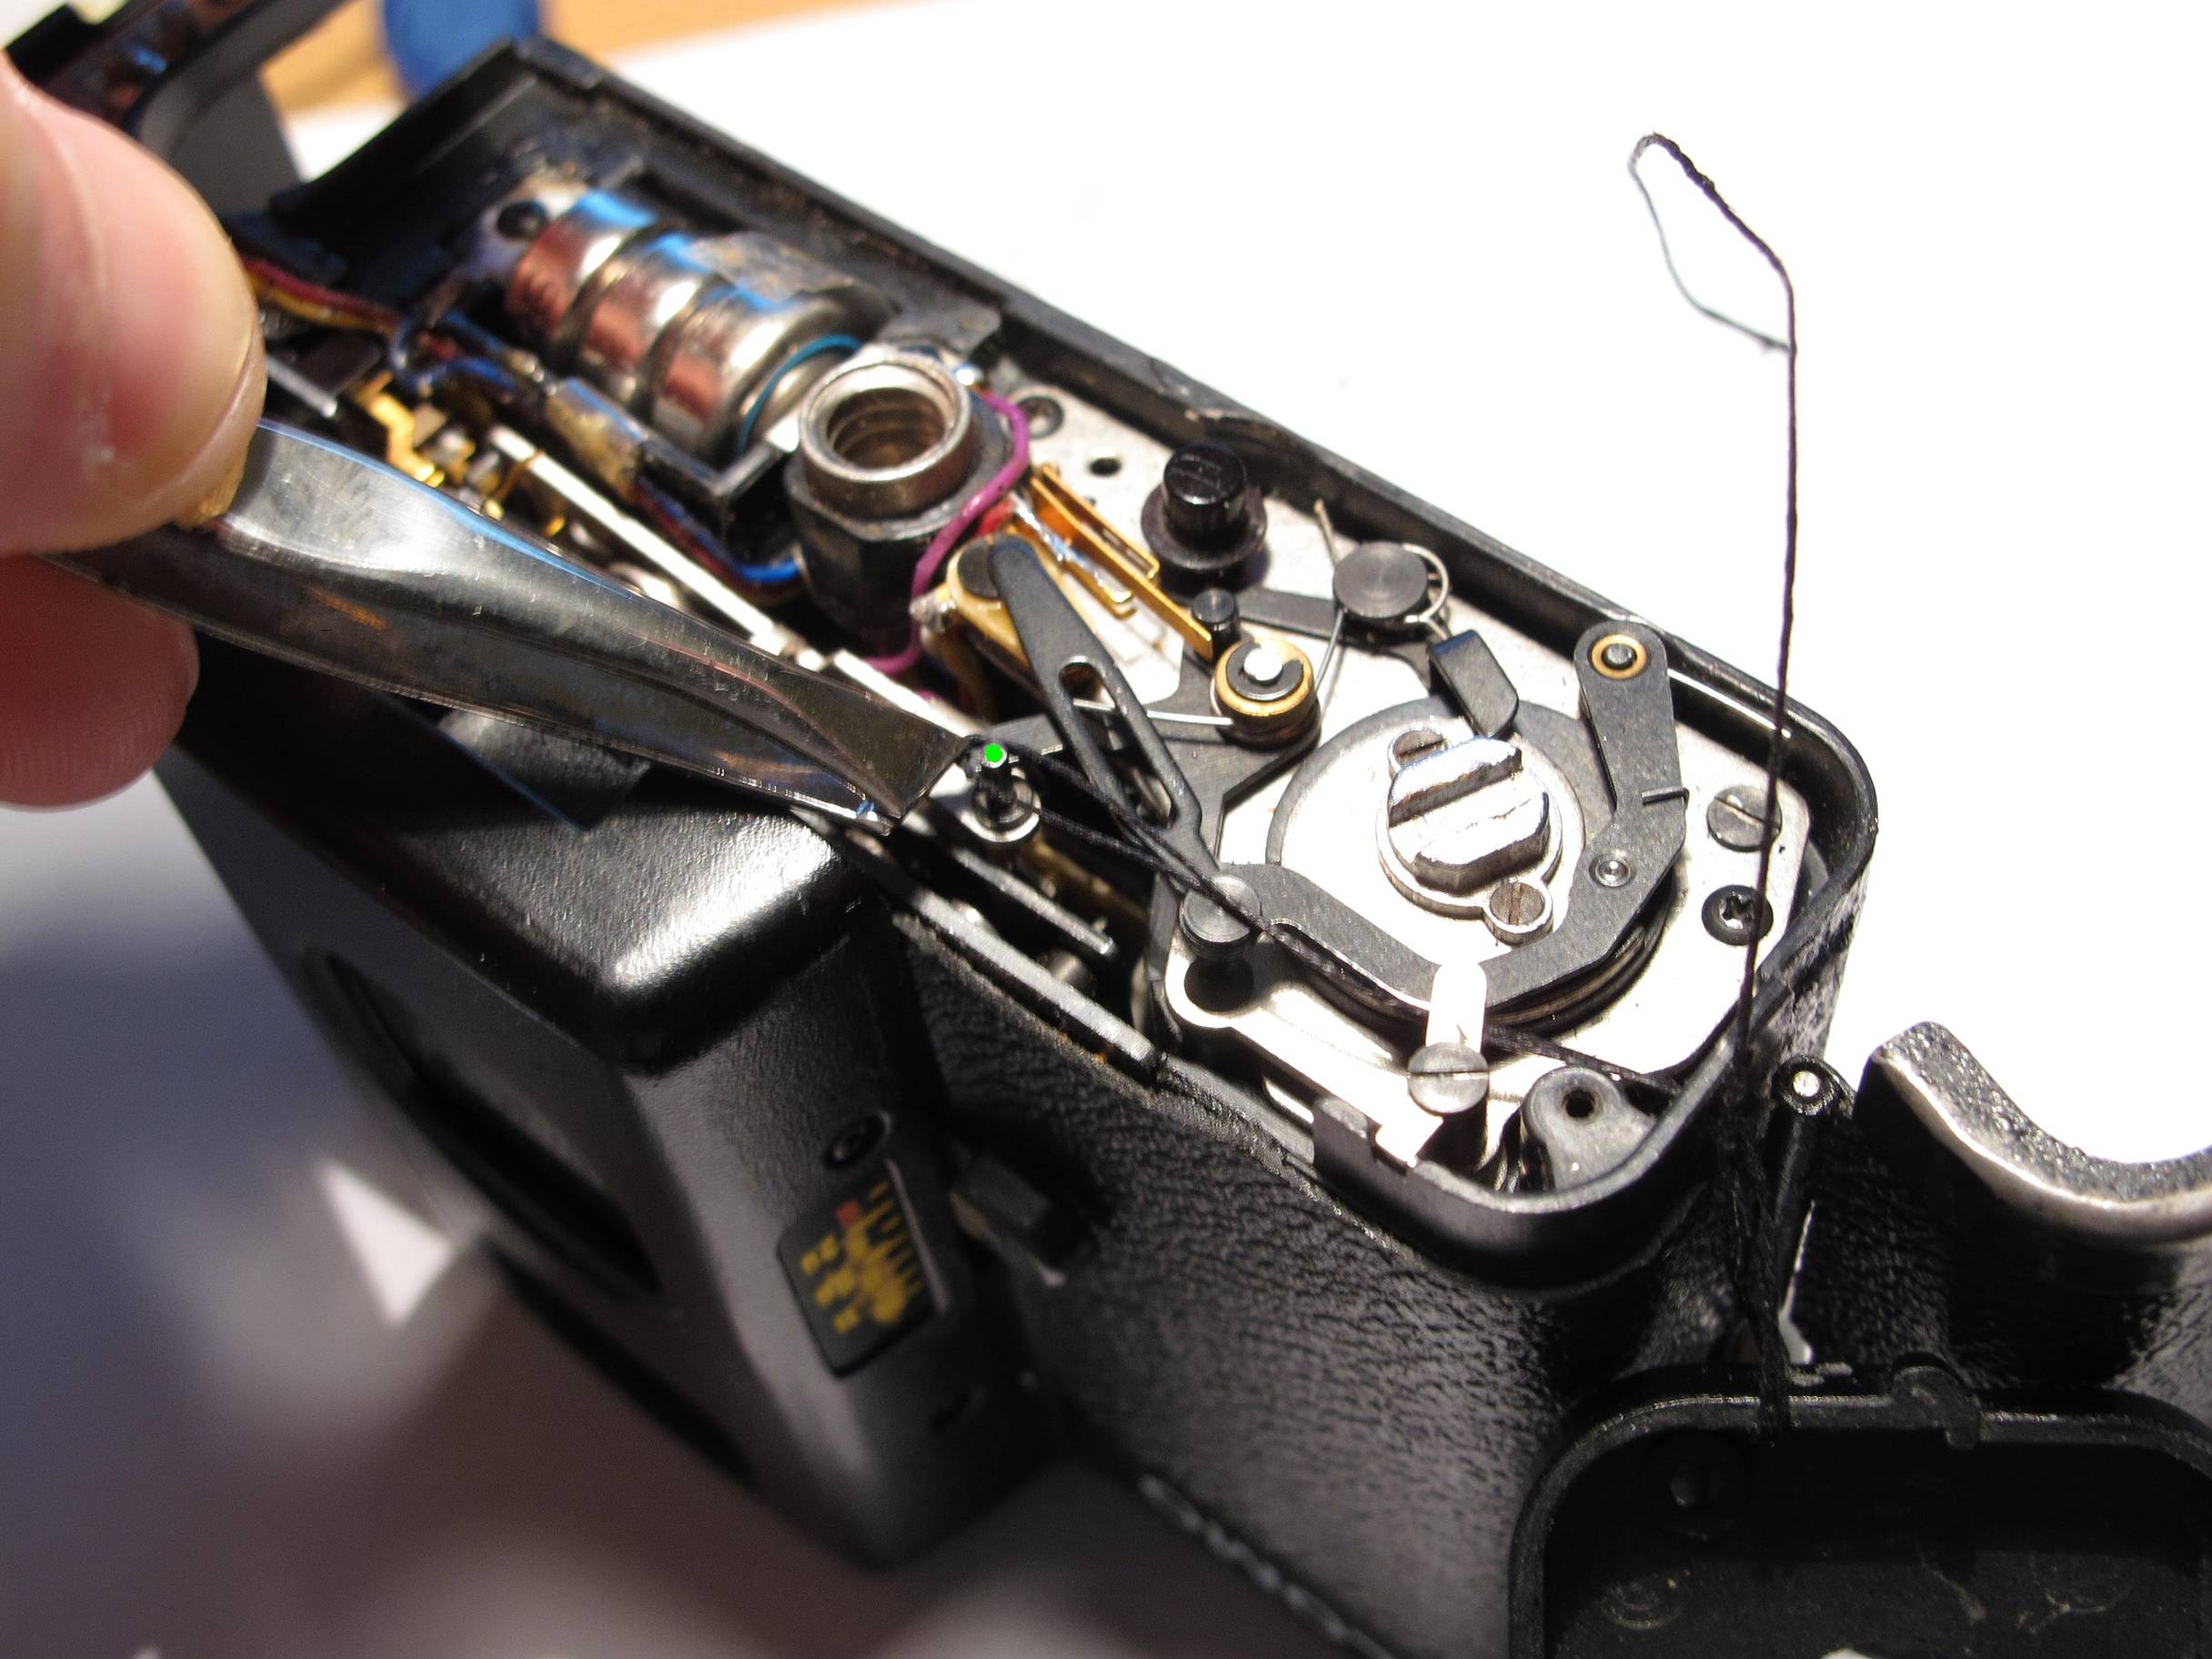
Don’t pull it all the way through! Just a bit. Now get your LC-A and put the little arm (marked with a red dot in the picture) carefully(!) down, like in the picture. Because in the next step we put the loop through the hole in the camera body:

Now it’s time to use the tweezers! Pull the string carefully through your camera and put the loop over the little pin (green dot).
Can you see how the bottom plate is still on the string? Like pearls on a necklace.
Make sure the string runs nicely beneath the top metal parts of the camera:

You’re almost done! Carefully put the little arm (red dot) back in it’s place. Don’t lift it too high! It’s very fragile!
Now it should look like that:

Okay, now you can put the bottom plate back on. Bring a bit tension on the string while doing this. It’s necessary because if not, the string may get caught between the camera and it’s bottom plate.
The bottom plate is back where it belongs? Good! Now close the back of your camera. At this point it should look like that:

Now grab both of the two strings which show out of your camera. Gently pull them and listen carefully if you hear the shutter cock. The string should move smoothly in and out, and you shouldn’t need to force anything. If not, redo the last steps and search for the cause!
When you hear a clicking sound, it’s time to test the shutter button! It works? Perfect!
Finally, the last step: Knot the two ends together. Otherwise you could pull out the string easily and have to do everything again! Yes, I made this experience already…
And because of that I added a little button to the end:


But to be honest: The button easily clings to your bag or stuff and rips of fast. So I think it’s better (safer for your LC-A!!) to use something smaller or just leave it tied together without doing something fancy ;) At least that’s the way I’m keeping it now.
Congratulations you’ve made it! Good feeling huh? :)
Feel free to comment and share your thoughts! Any ideas for an MX mode, too?
written by wafflesaurus on 2013-05-23 #gear #tutorials #lc-a #camera #tutorial #classic #mx #tipster #string #multiple #technique #easy #lomo #lomography #mod #exposures #lca #how-to #mode #drill #lc-a #select-type-of-tipster #select-what-this-tipster-is-about #wafflesaurus


20 Comments