Lomography Tutorials: How to Repaint Your Beater Camera
7 19 Share TweetRemember that old film camera you've had so much fun with when you took up photography? Remember when you used to run a handful of film rolls through it just to get your analogue fix? If you do then it's probably time to whip it out now before it gets lost in that dusty little corner of your camera cabinet.

Having a beater camera is a thing we can all relate to. We've learned a lot about photography, discovered our style with it, and we've seen how far we can go in our pursuit of beautiful surprises with that basic little camera. Now it's time to rediscover the love and give it the TLC it needs by giving it a quick cleaning and a new coat of paint.

Refurbishing a camera is a fun way to learn more about what makes our gear tick. Tinkerers will know what we're talking about — the excitement of pulling apart a camera and putting it back together is a feeling like no other. It just makes you all warm and giddy inside. To get things started, here are some of the things you'll need to start working on your beater camera:
Materials

- A roll of masking tape
- A pair of scissors
- A precision cutter (a small box cutter will do)
- A pair of precision pliers (needle nose pliers)
- A soft-bristled brush
- A can of spray paint (your color of choice)
- A set of precision screwdrivers
- One pad of 600-grit sandpaper (grit depends on the condition of your camera)
- Paper towels
- Rubbing alcohol
- Cotton balls/cotton buds (optional)
Steps
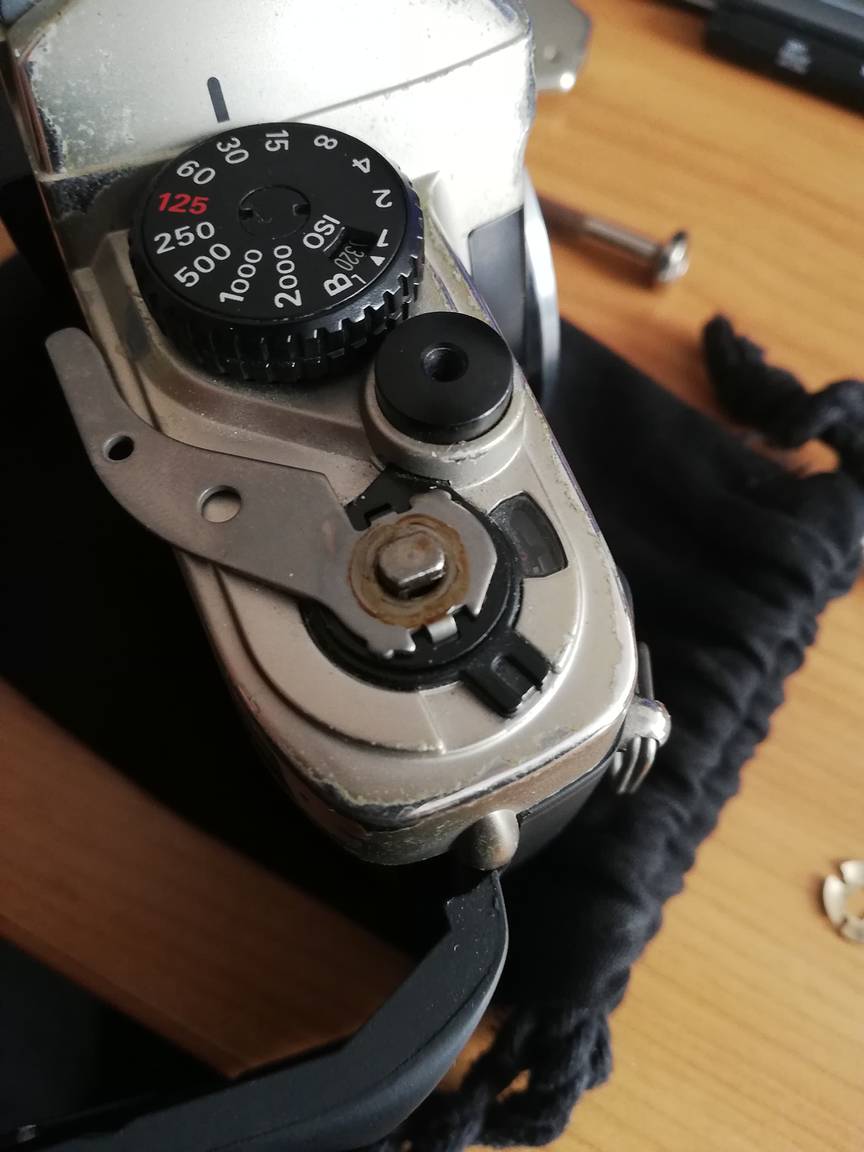
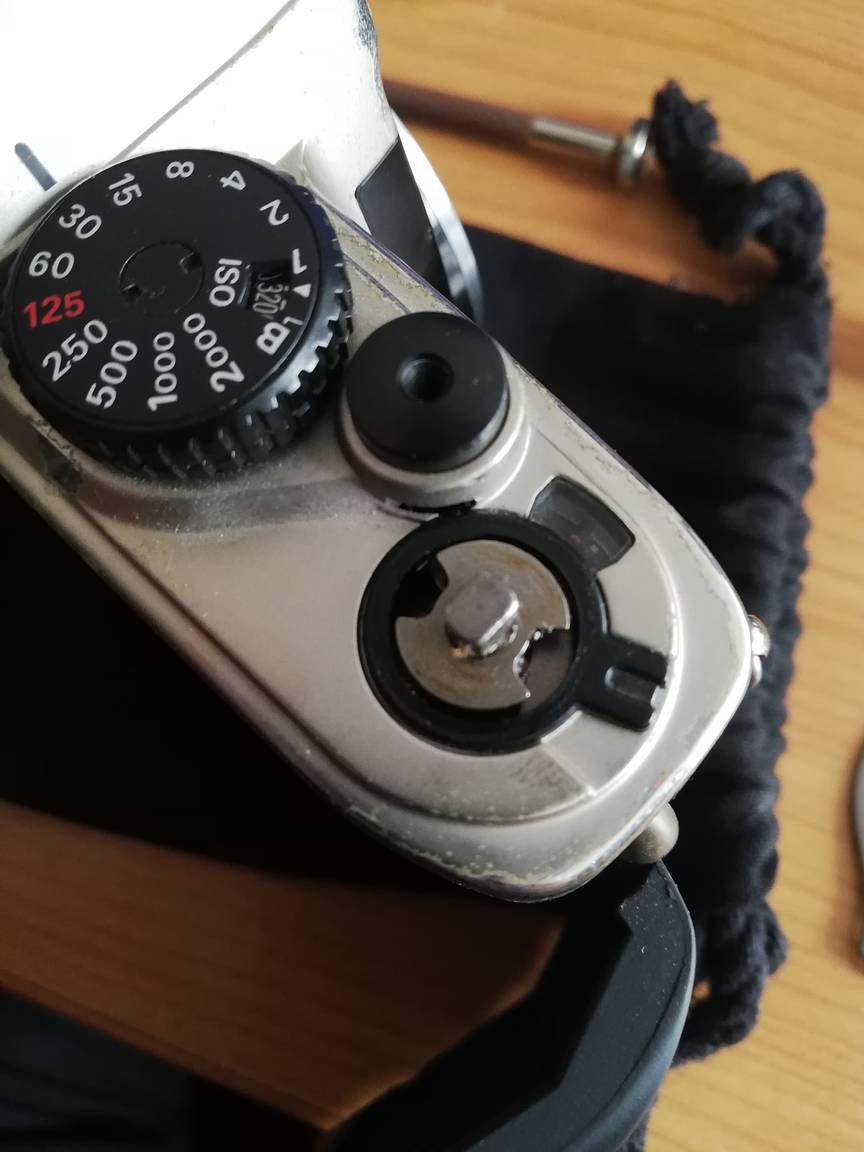
1. Disassemble your camera.

This may be daunting to some since there are different ways to pull apart a camera. What we did with this beater camera (a Nikon FM10) was to look around the internet for repair manuals so we have a better grasp of the disassembly steps. Luckily, we found the Elektrotanya site where you can find all sorts of service manuals for DIY repairs. The Nikon FM10 was a bit difficult to pull apart due to its top plate being obstructed by different control knobs and levers so we ended up just keeping the plate on after removing the necessary parts. We used a set of precision screwdrivers and a pair of needle nose pliers to get this done. Hobby shops and hardware stores usually carry them for a good price.
2. Label the parts you took out.


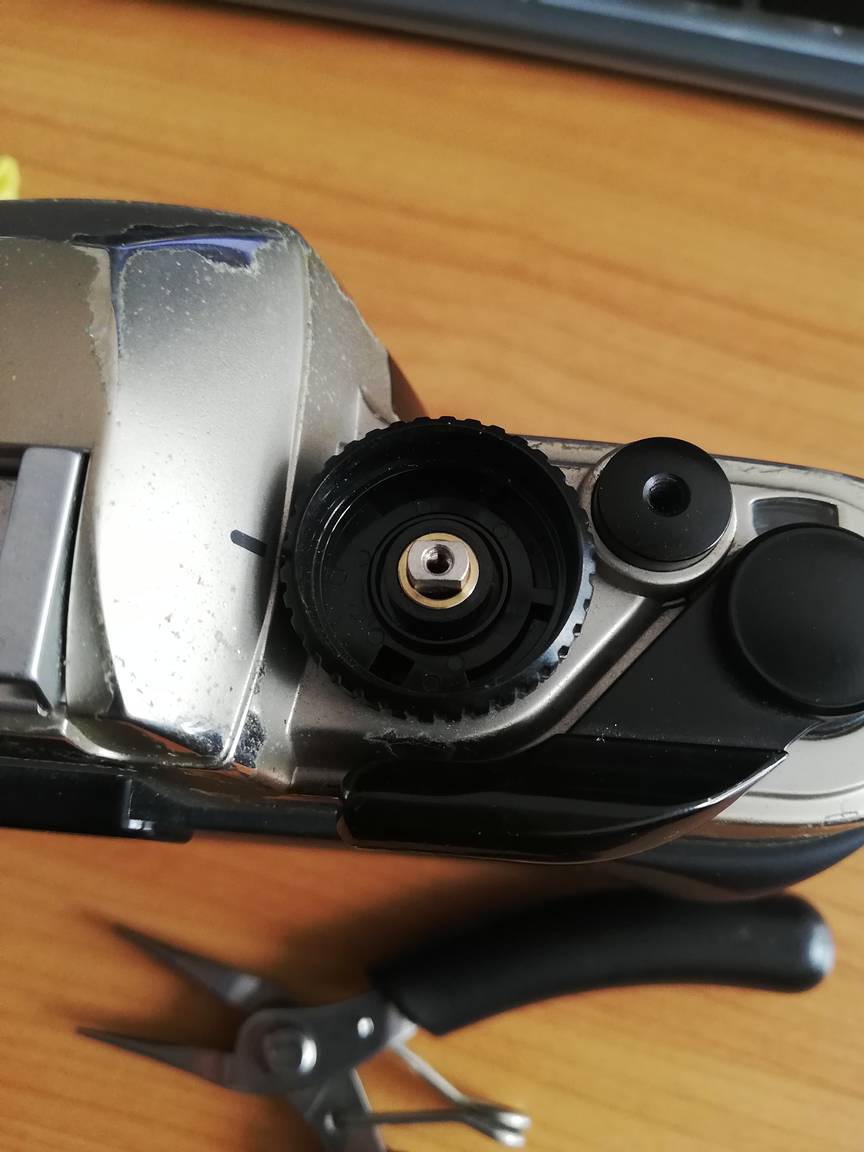

Keeping things organized during a refurb/repaint session is a must. You wouldn't want to mess up your functional camera just because you forgot which component goes into which part. It's helpful to take photos of the disassembly process before moving on to the other steps. Again, a service manual will help you see how every piece fits so do your best to find one for your camera.
3. Sand it all down.

One of the most important steps in the refurb/repaint of your camera is sanding. This is done to make sure that your paint adheres to your camera's surface. Skipping this part may cause the paint to easily chip and strip and that's definitely not the way you'd want to go. To remove the paint fully, you can try using low-grit sandpaper and move on to higher-grit pads as you progress. For this particular camera, we used 600-grit sandpaper all the way since the FM10's top and bottom plates are made of plastic.
4. Brush off dust and paint residue.
After sanding, it's advisable to use a soft-bristled brush to remove excess dust and paint residue to keep your camera clean. This also ensures that you have a good surface to work on when it's time to paint. Also, make sure to get in between those hard to reach places to give your camera a much-deserved cleaning. A camera blower/cleaner will also help.
5. Give your camera's surfaces a good wipe down.
Take some paper towels (if possible, use lint-free ones) and put some rubbing alcohol on them. Use the alcohol-infused paper towels to clean all the parts you just sanded down. This will make sure that your painting surface is spotless since any trace of dirt, dust, moisture, and grease will mess up your paint job.
6. Mask all the parts you don't want to get paint on.

Using the roll of masking tape and scrap paper, cover all the parts that you don't want to get painted on. Use your scissors and cutter to cut the tape and paper into different shapes to cover all the holes and nooks of your camera. If you've successfully taken the camera apart, this step will be a whole lot easier. You can also do a quick wipe down again to make sure all of your camera's surfaces are clean.
7. Prepare your painting area.
Make sure you do your painting in a well-ventilated area. The fumes from the spray paint can be toxic when inhaled. Use a face or gas mask if you have one. Make sure that your painting area is also dry and free from dust particles to avoid blemishes in your paint surface.
8. Apply a new coat of paint.

Using the can of spray paint, apply a thin layer of paint in a left to right and vice versa pattern (you may also go from right to left depending on your dominant hand) while keeping a consistent spray pattern and distance. Begin spraying a small distance away from your surface area to make sure that you apply a uniform coat of paint. No need to do it all in one go. You can always go for another layer of paint if you didn't apply enough. Make sure to let your surface area rest for 3-5 minutes in between coats to keep a uniform spray pattern.
Extra tip: read your spray can's instructions before proceeding. The manufacturer knows the best way to apply their product. Also, you may choose to use a primer before your actual paint to make sure the color stands out. Since we chose to use black in this refurb/repaint session and the surface area is plastic, we just went to the painting stage directly without primer. You may also use a clear coat to finish the paint job to keep it glossy. The clear coat will also add another layer of protection against chips and scuffs.
9. Let your surface area rest.
We know how excited you are! We were too when we did this repainting but we can't just peel the masking off just yet. Let the camera rest for a while to make sure that the paint really adheres to the surface area. Handle the camera too soon and you might smudge the paint or chip it. We suggest letting the newly painted plates to rest for 15 to 30 minutes if you're not in a rush. Patience is a virtue. :)
10. Peel off the masked areas, give the camera a quick brush off, and begin assembly.

Time for the moment of truth! Peel off the masked areas and start removing the tape and paper bits you applied earlier. Brushing off excess dust is also a good idea in this stage. Again, using the service manual and the photos you took during disassembly for reference, you may start putting your camera back together again.
And you're done! Congratulations on a successful refurb/repaint session! Now your old camera looks brand new and is ready for more analogue action.
If this is your first attempt at painting, you may see some spots that need a little more paint but don't worry! With enough practice, we're sure you'll get good at painting all the surfaces in a nice and uniform manner. We missed some spots, too! And that's okay because little imperfections are welcome here in Lomography. :)
Sound off in the comment section below to share your tips and tricks on how to refurbish/repaint cameras. Bring out those old faithfuls and rediscover the feeling of shooting with your beater camera!
written by cheeo on 2019-02-08 #gear #tutorials #slr #repaint #refurbish #lomography-tutorials


7 Comments