The Art of the Blur
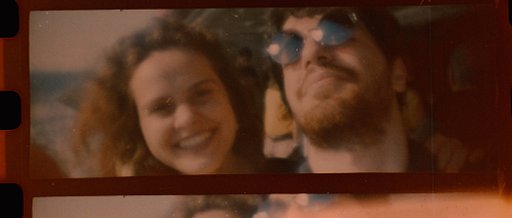
32 Share TweetIn our previous article, we talked about improving image quality and adding sharpness to your photographs. This time, we're taking the other route to explore the use of blur in photography. It always pays to try something new, especially if you would like to avoid creative rut when it comes to your photography.
Contrary to what our instinct tells us, motion blur isn't totally bad given that you know what you're doing. In fact, it can actually help you grow as a photographer as it can teach you how to make more dynamic shots using simple techniques. Let's count down the ways on how you can use motion blur to up your photo game.
1. Study timelapse/long exposure shots.
We've always been taught that clear photographs are the way to go. There's nothing wrong with that thinking. Honestly, our instinct as photographers points us to the direction of clear and well-focused photographs. However, there is a way to use blur in your work correctly and that is by way of shooting timelapse photos or long exposures. The idea is simple, you need to open up your shutter for a prolonged period of time to introduce motion blur in your image. This doesn't mean that your whole image gets blurred, just a part of it.
Static objects in your frame get the correct focus while you get motion blur from moving objects. Are you wondering how those night shots with stars streaking in the skyline are called? Those are timelapse photographs and they're an absolute joy to look at.
2. Use slow shutter speeds.
Now that you've seen examples of timelapse shots, it's time to get to work. Long exposure shots are captured by using slow shutter speeds. This technique lets you gather as much light as possible in order to get the blurring that you're after. This can work in day or night time and the result will also vary depending on your settings and camera placement. As always, too much of anything can do harm to your shot so be mindful of the duration that you keep your shutter open. Set it too long and you might risk overexposure and unnecessary blurring.
3. Be aware of the lighting conditions.
Since you're generally aiming for longer exposure times, you're going to want to mind your lighting as well. The longer your shutter is open, the more light it lets in. One good way to shoot timelapse images and capture motion blur is by shooting under low light conditions. But don't let that stop you from trying this kind of shot during the day. You just have to adjust your settings accordingly and since there's more light, you can reduce your exposure time and reduce your aperture.
4. Stability is your friend.
Timelapse and long exposure shots need more than longer exposure time and a wide-open aperture. They also need stability. Use a tripod or place your camera on a stable and flat surface to eliminate camera shake. If you can, use a shutter release cable to keep your shot more stable. Nothing is more frustrating than ruining a well-planned timelapse with a shaky hand or shutter finger.
5. Pan your camera.
It doesn't always have to be long exposures! Blurring can also be applied to action shots to illustrate motion and movement. Motion blur is actually good for sports photography since it gives the image a more dynamic look and feel. It can show speed and movement with the right amount of motion blur.
How about you? How do you use motion blur in your photography? Share your tips and tricks in the comment section below!
written by cheeo on 2019-12-24 #tutorials #tutorial #blur #tipster


No Comments