Think Tank: Scanning as a Personal Interpretation
1 10 Share TweetLike in all creative processes, every step in film photography matters: preparing, shooting, developing, scanning, printing, digitizing, presenting, and everything else that comes in between. There's always a creative choice to make in each phase of film photography.
We believe that scanning is a process in the analogue routine that is very geared to personal interpretation. Read this piece further on why you, as an artistic and creative photographer, should be scanning your own negatives.


Creative Issues with Not Self-Scanning
For most photographers, self-scanning (along with self-developing) becomes an easily optional step. It's understandable why, since the rest of the other phases are already taxing. Film photo labs also give us the convenience to skip these steps, especially in our already busy lives. However, for those seeking to create something beyond typical compositions, scanning becomes just as vital as any step in the analogue way.
If you're a regular customer with film laboratories and shops, you already know how limited the services are for non-35 mm negatives. It is also almost protocol to opt-out the film sprockets when you avail of scanning services, as the frameless look is the safest bet for the many. Requests to include the frames and sprockets can be made, but there's no guarantee that your local shop will do so due to the high volume of work they are doing. Pretty much, your images can instantly look simply standard.
It is without a question that scanning your own negatives gives you more freedom and control over the results. More importantly, the process of scanning defines the overall look of the image, whether it is a conscious or unconscious intention to do so.


Details of Film: How Self-Scanning Films Define an Image and Aesthetic
At the end of the day, how we present our images — the final shots that we upload on our LomoHomes or other social media — heavily relies on the outcome of our scans. The tools we use can also become definitive elements in our work. In this case, the film.
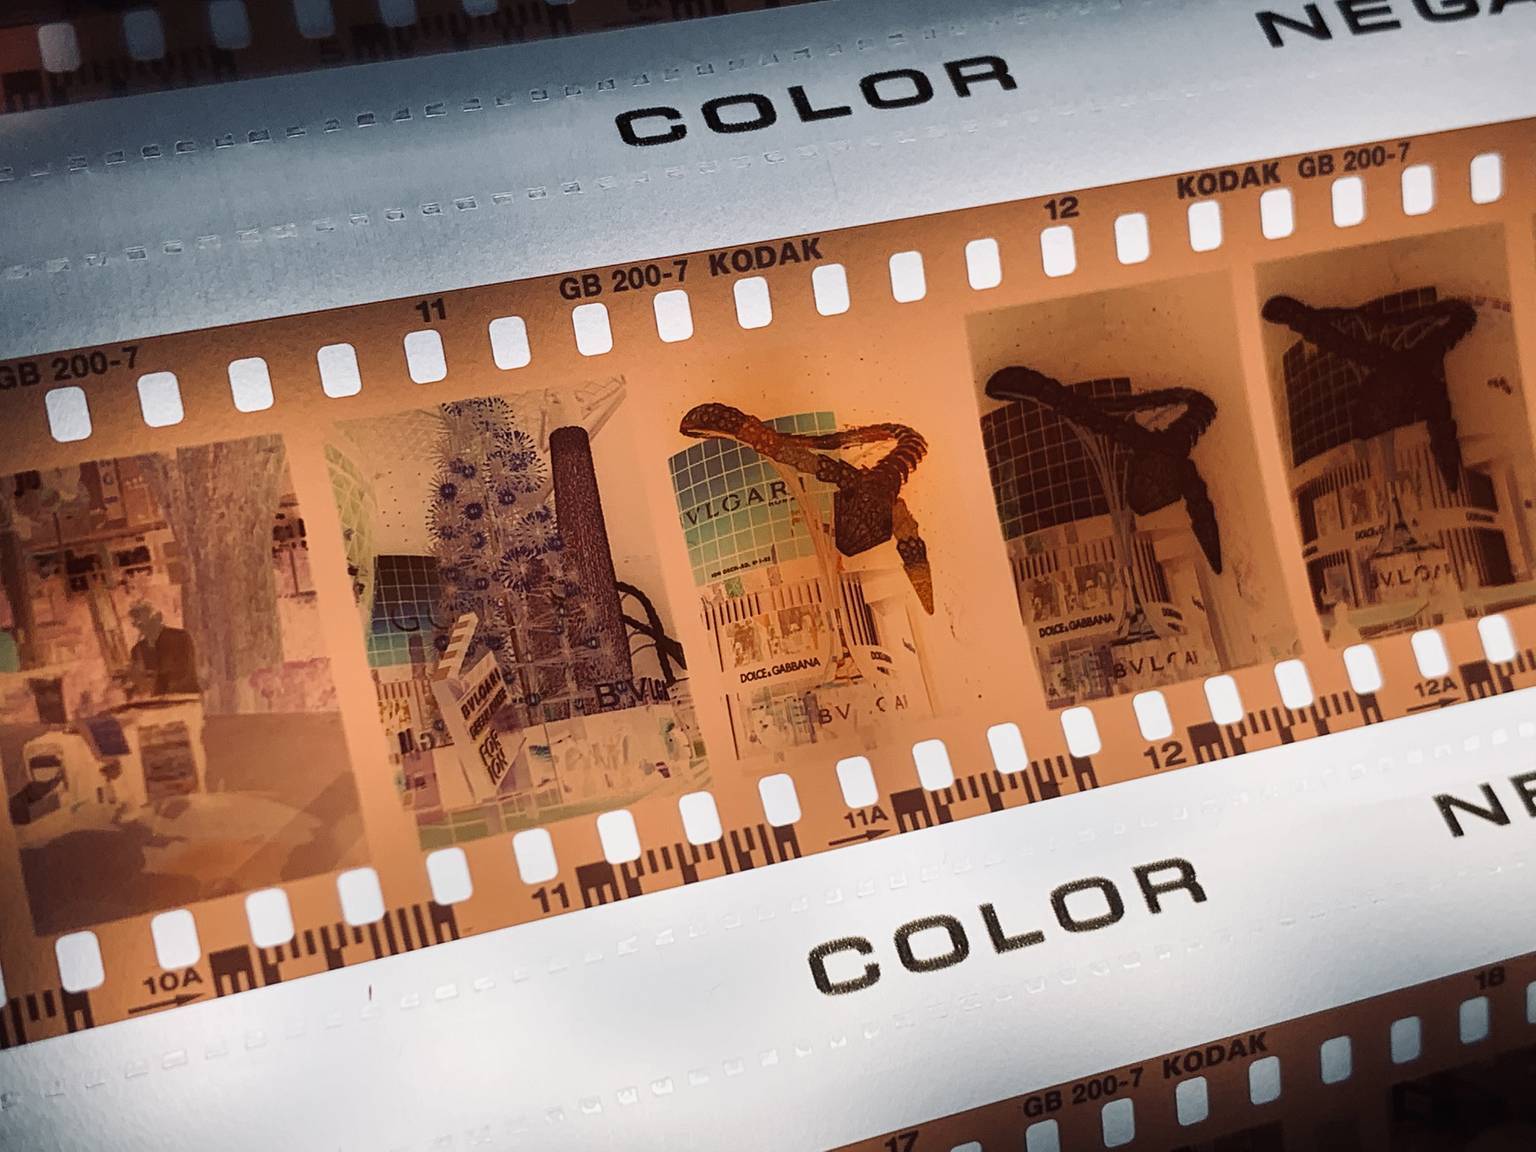
Beyond the four frames of the image are the very structures of the film negative (or positive). Apart from getting the vintage and cinematic look with sprocket holes or film perforations, the dark plastic that borders each exposure can tell stories. The edge markings we see on the borders show us the information about a series of images taken with that single roll of film. Some of the information here includes the manufacturer and emulsion that was used. The sizing format that the photographer used may also be shown in the image (did you know that when you're using 16 mm film, the footage numbers can be lesser in terms of interval?) The markings also share the order that certain exposure was taken. Even the shape of sprocket holes or perforations speaks a lot about the artist's tools and process. In short, the frames tell us about the film that was used. Ultimately, these aspects from the scanning method can answer the why's and how's when we try to interpret or analyze a photograph, or a series of photographs.


Another style-defining aspect that we get from the scanning process is the color render. See, each film laboratory or scanning service will likely have their default color settings, preferred scanning methods (and maybe even color profiles) when they digitize your negatives. A concrete example of this is an experiment by Thomas Domise of Argentique Deux Point Zero, who requested our French Lomography team to scan his roll of LomoChrome Metropolis. Later in a blog post, Thomas compared and contrasted the scanned negatives from Lomography versus the other laboratories. He found out that each batch of scans from various laboratories (all were using different brands of scanners) differed greatly with regards to the color balance and temperatures. Some turned too cooler and bluish while some were too warm with more yellow tones compared to the intended subtle muteness of the LomoChrome Metropolis. Thomas shared from this experience that the right and correct 'scan' is the one that matches your aesthetic interpretation.
Scanning your own negatives can save you a lot of time and money as you get full control of the outcome — from its white balance, shadows, highlights, and more. If you want your LomoChrome Metropolis to be warmer, cooler, or just as is, you have all the means to fulfill your interpretation by doing it yourself. The goal for every artist is to make every work unique and personal as much as they can. Your personal interpretation of your photographs is crucial to the final output.


Out of the Box, Beyond the Frame: How to Artfully Scan and Digitize
So, how does one actually employ 'personal interpretation' in scanning? It's quite simple, really. You let your instincts lead you.
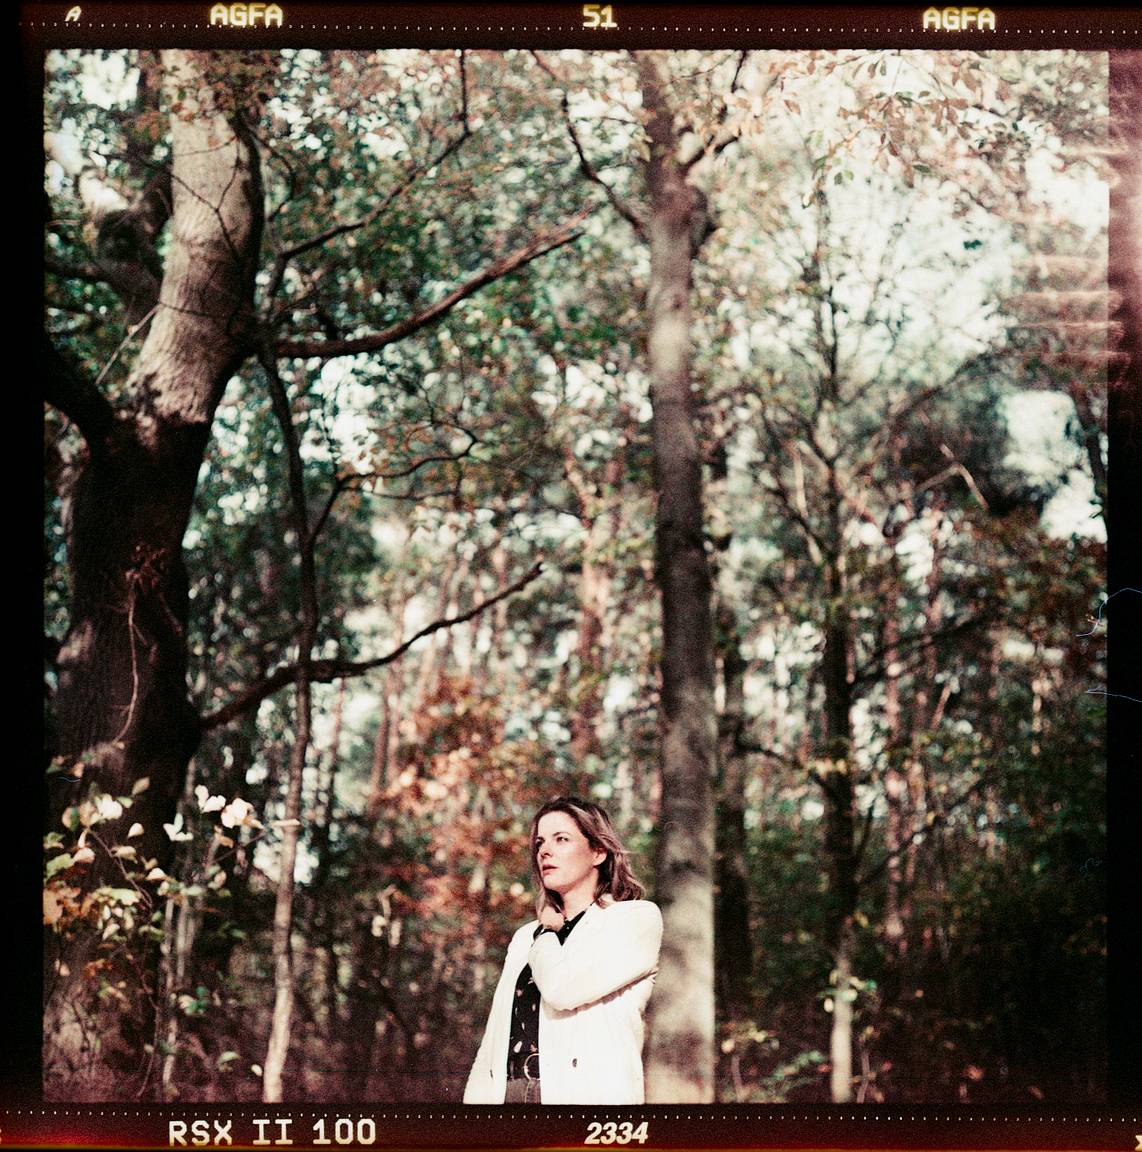
It's also almost always a routine for with 110 film shots to present the entire frame. The medium format or 120 always looks extra stylish when framed with the edge markings. They also emphasize the images further, especially if the compositions are mostly minimalist or clean. Photographer Benjamin Arias scanned his simple 120 format film with a DSLR camera and Lomography's Digitaliza, and they ended up having a subtle spice into them due to the edge markings.


There's also ghetto scanning, a process in which involves the negative (while supported by the Digitaliza) is held up on a window. With the negative still held up, you take a digital photo of the scan and invert the negative to a positive on a computer. This method allows longer and extensive panoramas, as well as storyboard-like compositions by combining three exposures in one image.
Here are some other unique efforts we've seen in which scanning became a crucial phase in the image-making process.
we have the contact sheet-style as done by Franklin Ruiz. His panoramas are arranged similar to how your regular 35 mm contact sheets are organized. With each scan containing three panoramas that also show the sprocket holes, the layout gives us a sense of Franklin's storyboarding method for these colorful landscapes.
On a more technical side, you can also try cross-scanning, a process in which you use the color setting instead of monochromatic when it comes to black and white photos. If you already have your negatives printed, you may still continue post-processing your images through scanner art, a technique used by Lomographer @35mm_marlena.


The creative benefits of scanning your own film also come with cost-effectiveness. Learning how to digitize your own films with a flatbed scanner and scanning mask like the Digitaliza will also encourage you to work with other special-sized formats that most laboratories would refuse.
It's time to think outside of the box and take matters into your own hands. Unlock more creative possibilities, experiment like never before — get the full experience of the Lomography way and scan your own film negatives!
For our digitizing Lomographer-experts out there, how does the scanning phase influence the outcome of your work further and beyond? What are your tips for scanning beginners? Let us know through the comments below!
written by cielsan on 2022-03-09 #gear #culture #scanning #digitaliza #digitizing


One Comment