How To Make a Double Matchbox Pinhole Camera
5 43 Share TweetWorld Pinhole Photography Day/Week is coming up on the 24th of April and I wanted to share a ‘How to make’ with you all. Some years ago I put together two matchboxes and made a bizarre panoramic double image mash up cam which allows you to overlap, multi expose or juxtapose different images together. If you embrace a challenge and love the unexpected, then this is the cam for you.

I have been making pinhole cameras for some years now and I wanted to share with you one of the earliest cameras I made. When I got the results back they were fun and different – and because the images overlapped and had light leaks and rough edges, it all added to the build up of the image. The camera will take you about thirty minutes to make (as long as you are fairly dextrous). It is not difficult and does not require any special tools – In fact, the more junk you re-use the better!
What you will need:
- Two small matchboxes that should fit 35mm film
- Black paint, pen or spray matt if possible.
- Black insulation tape
- Card – Just a small amount for shutters
- One lolly stick (a perfect excuse to eat one first!)
- One used and empty film cartridge
- One unused film cartridge
- A plastic film pot
- Scalpel or craft knife
- Metal from a can or foil tray
- Bit of string
- Ruler (not essential)

1.First take a standard small matchbox, you’ll notice that 35mm film fits perfectly through it.
Cut the interior tray with any shape you desire but I have done a panorama for this one.
Paint, spray or marker the inside with black, preferably matt.

2.Get your second matchbox and do the same – But this time change the level of the mask you are cutting and put it lower so you have one up and one down in a horizontal/landscape formation.

3.Then take the outside of the matchbox and find the center – You must place this hole in line with the tray that is high.
Cut a small hole, this is where your pinhole will sit.
Do the same with the other matchbox, again ensuring that you match the pinhole position to the tray inside… so this one will be low.
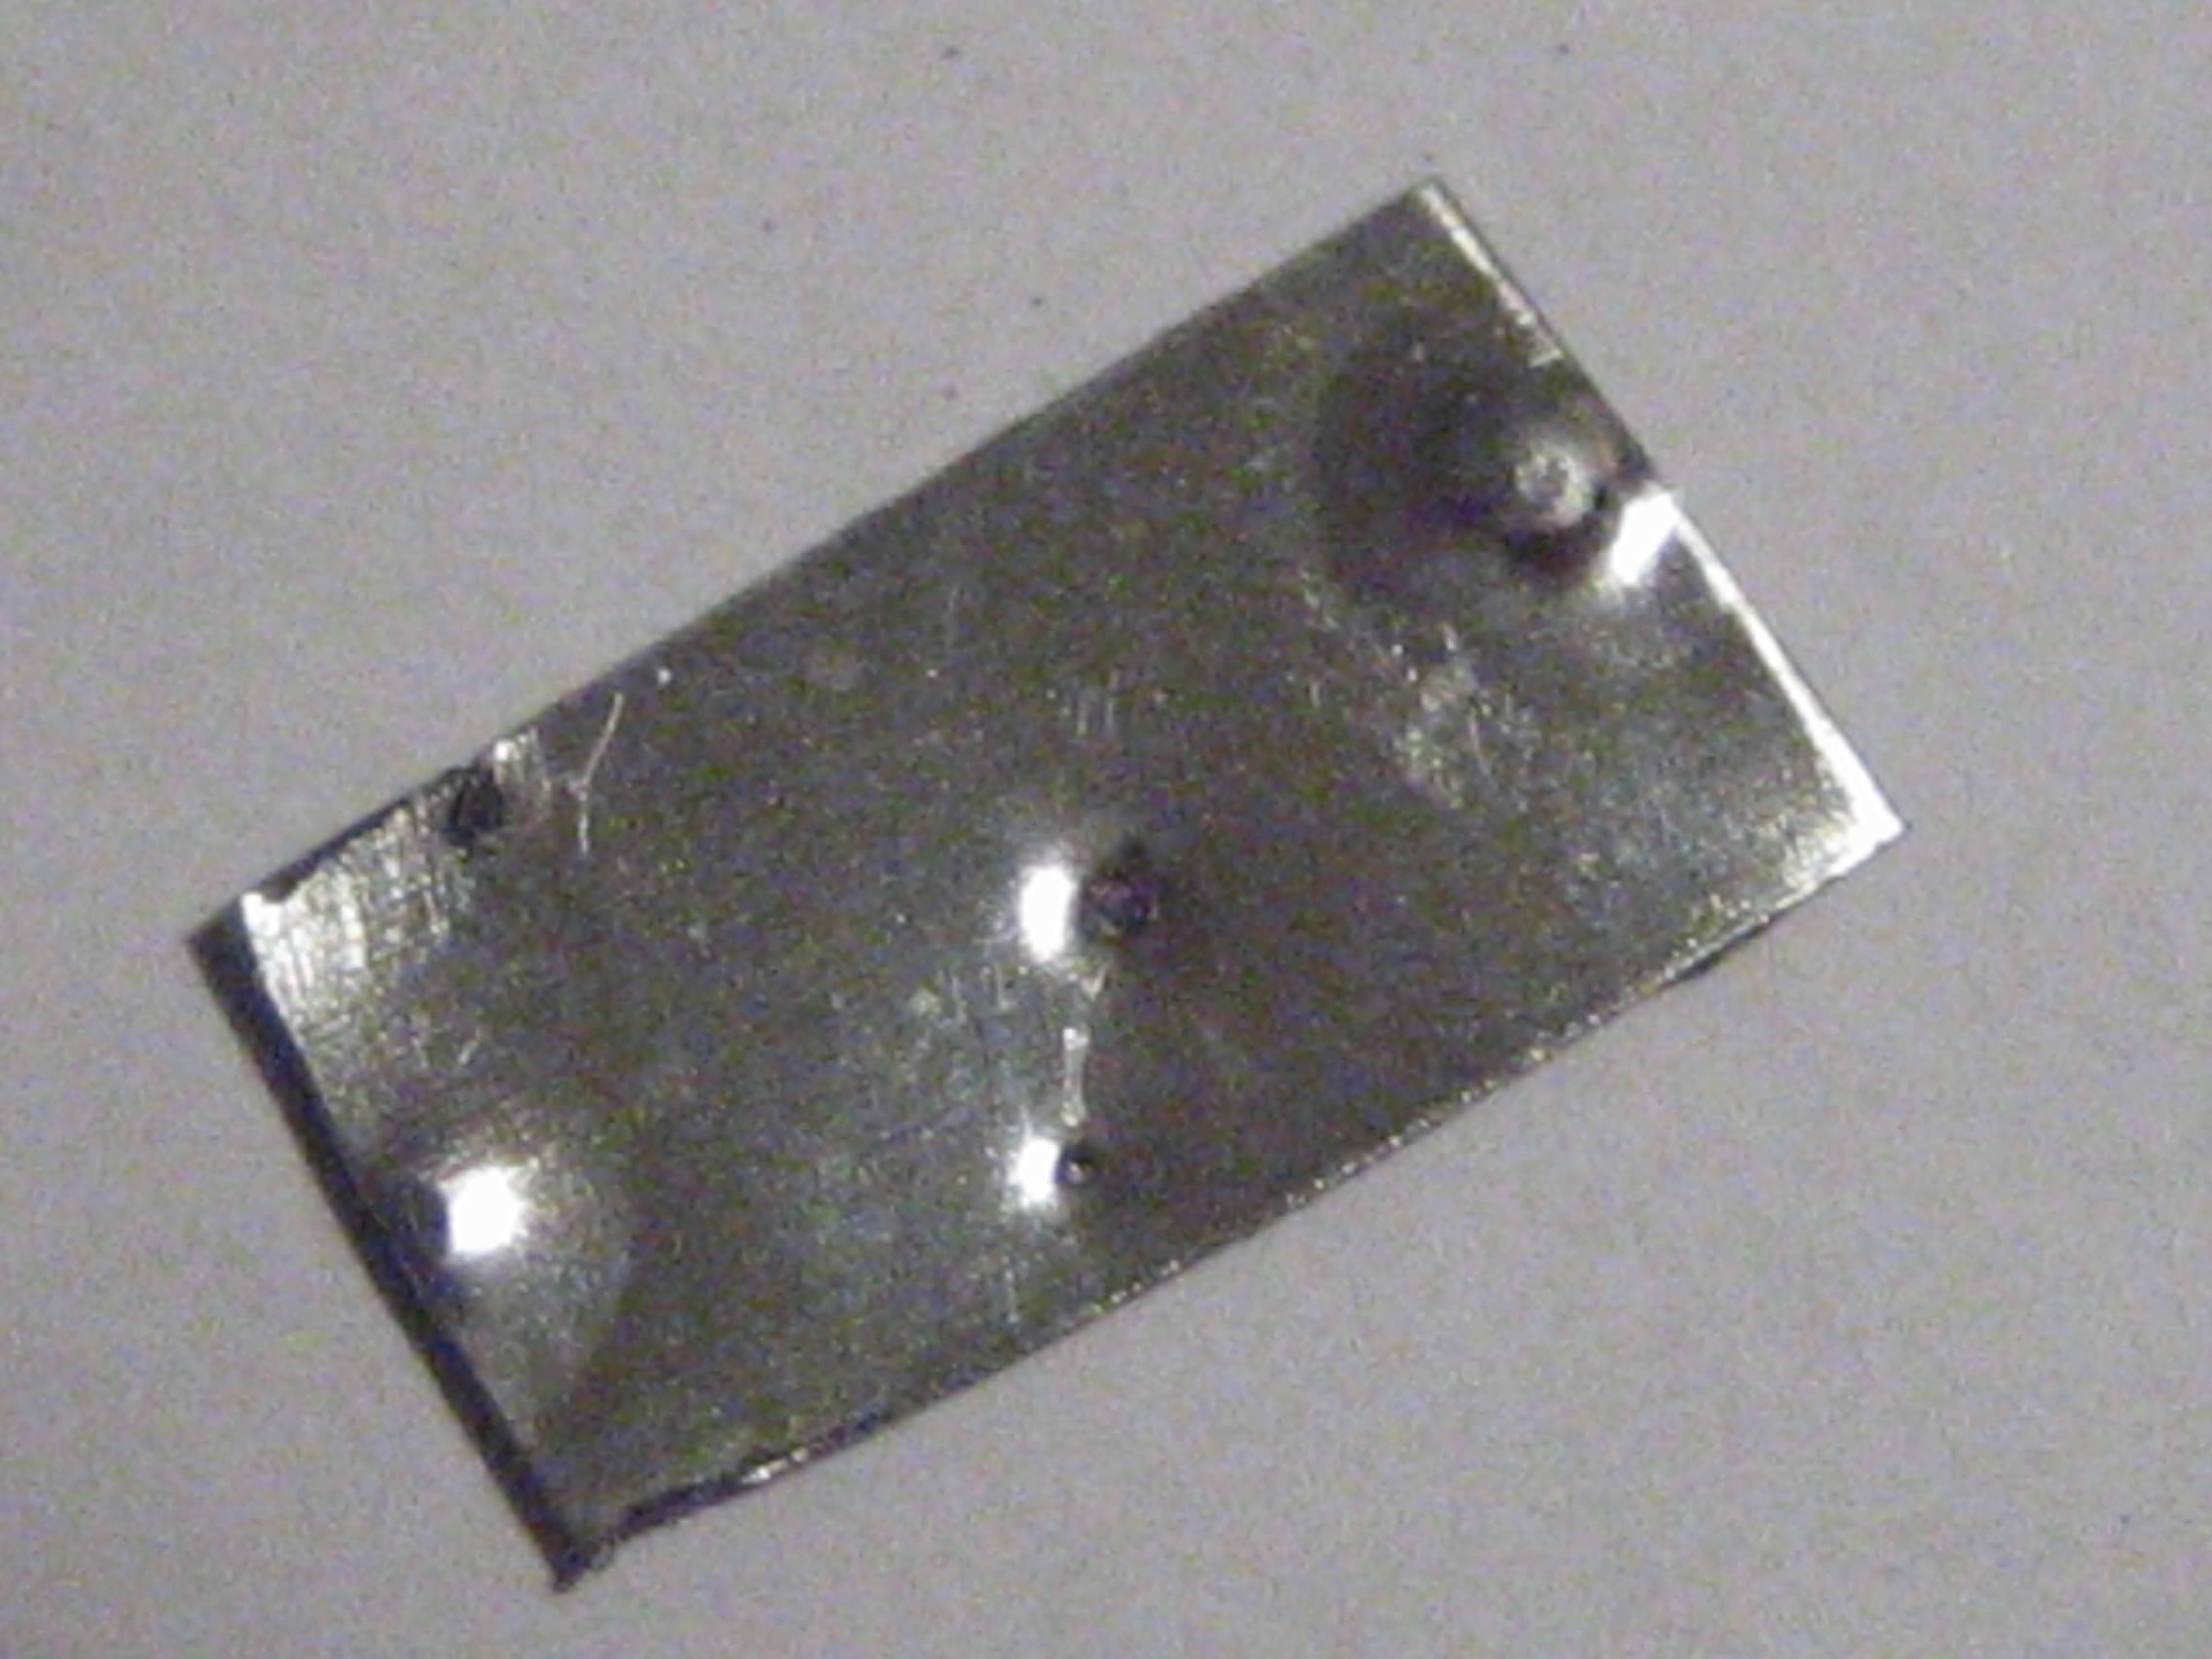
4.Make your pinhole. Get a piece of metal about 1 cm square/rectangular, enough to cover the hole you have made.
the metal can be from a drinks can or take away dish or it could be nice brass shim if you can get hold of it (as long as it’s thin aluminium).
Drill the fine hole by turning the needle or the metal until it goes through. There is always a burr on the metal but it may not be visible. Feel how rough it is.
Fine grade emery paper is what you need to smooth this away. Gently sand both sides in a circular motion – Be careful not to lose the circular shape of the hole and only make one hole! Blacken both sides of this, or just one if you prefer.

5.Attach this to the matchbox hole as centrally as possible and tape down with the ubiquitous Black insulation tape. Tape all four sides down.
Do not cover the pinhole at all. Do the same with the other box

6.Place the two boxes next to each other, do not tape together yet.

7.Now I’m assuming you want a clicker so you can count how far you have wound on. It is not necessary so just miss this bit if you don’t want one.
I cut a flexible piece of plastic from the rim of a film pot using a scalpel, taper the ends so it will fit through the sprockets.

8.Attach to the film with some tape, making sure the film moves freely forward

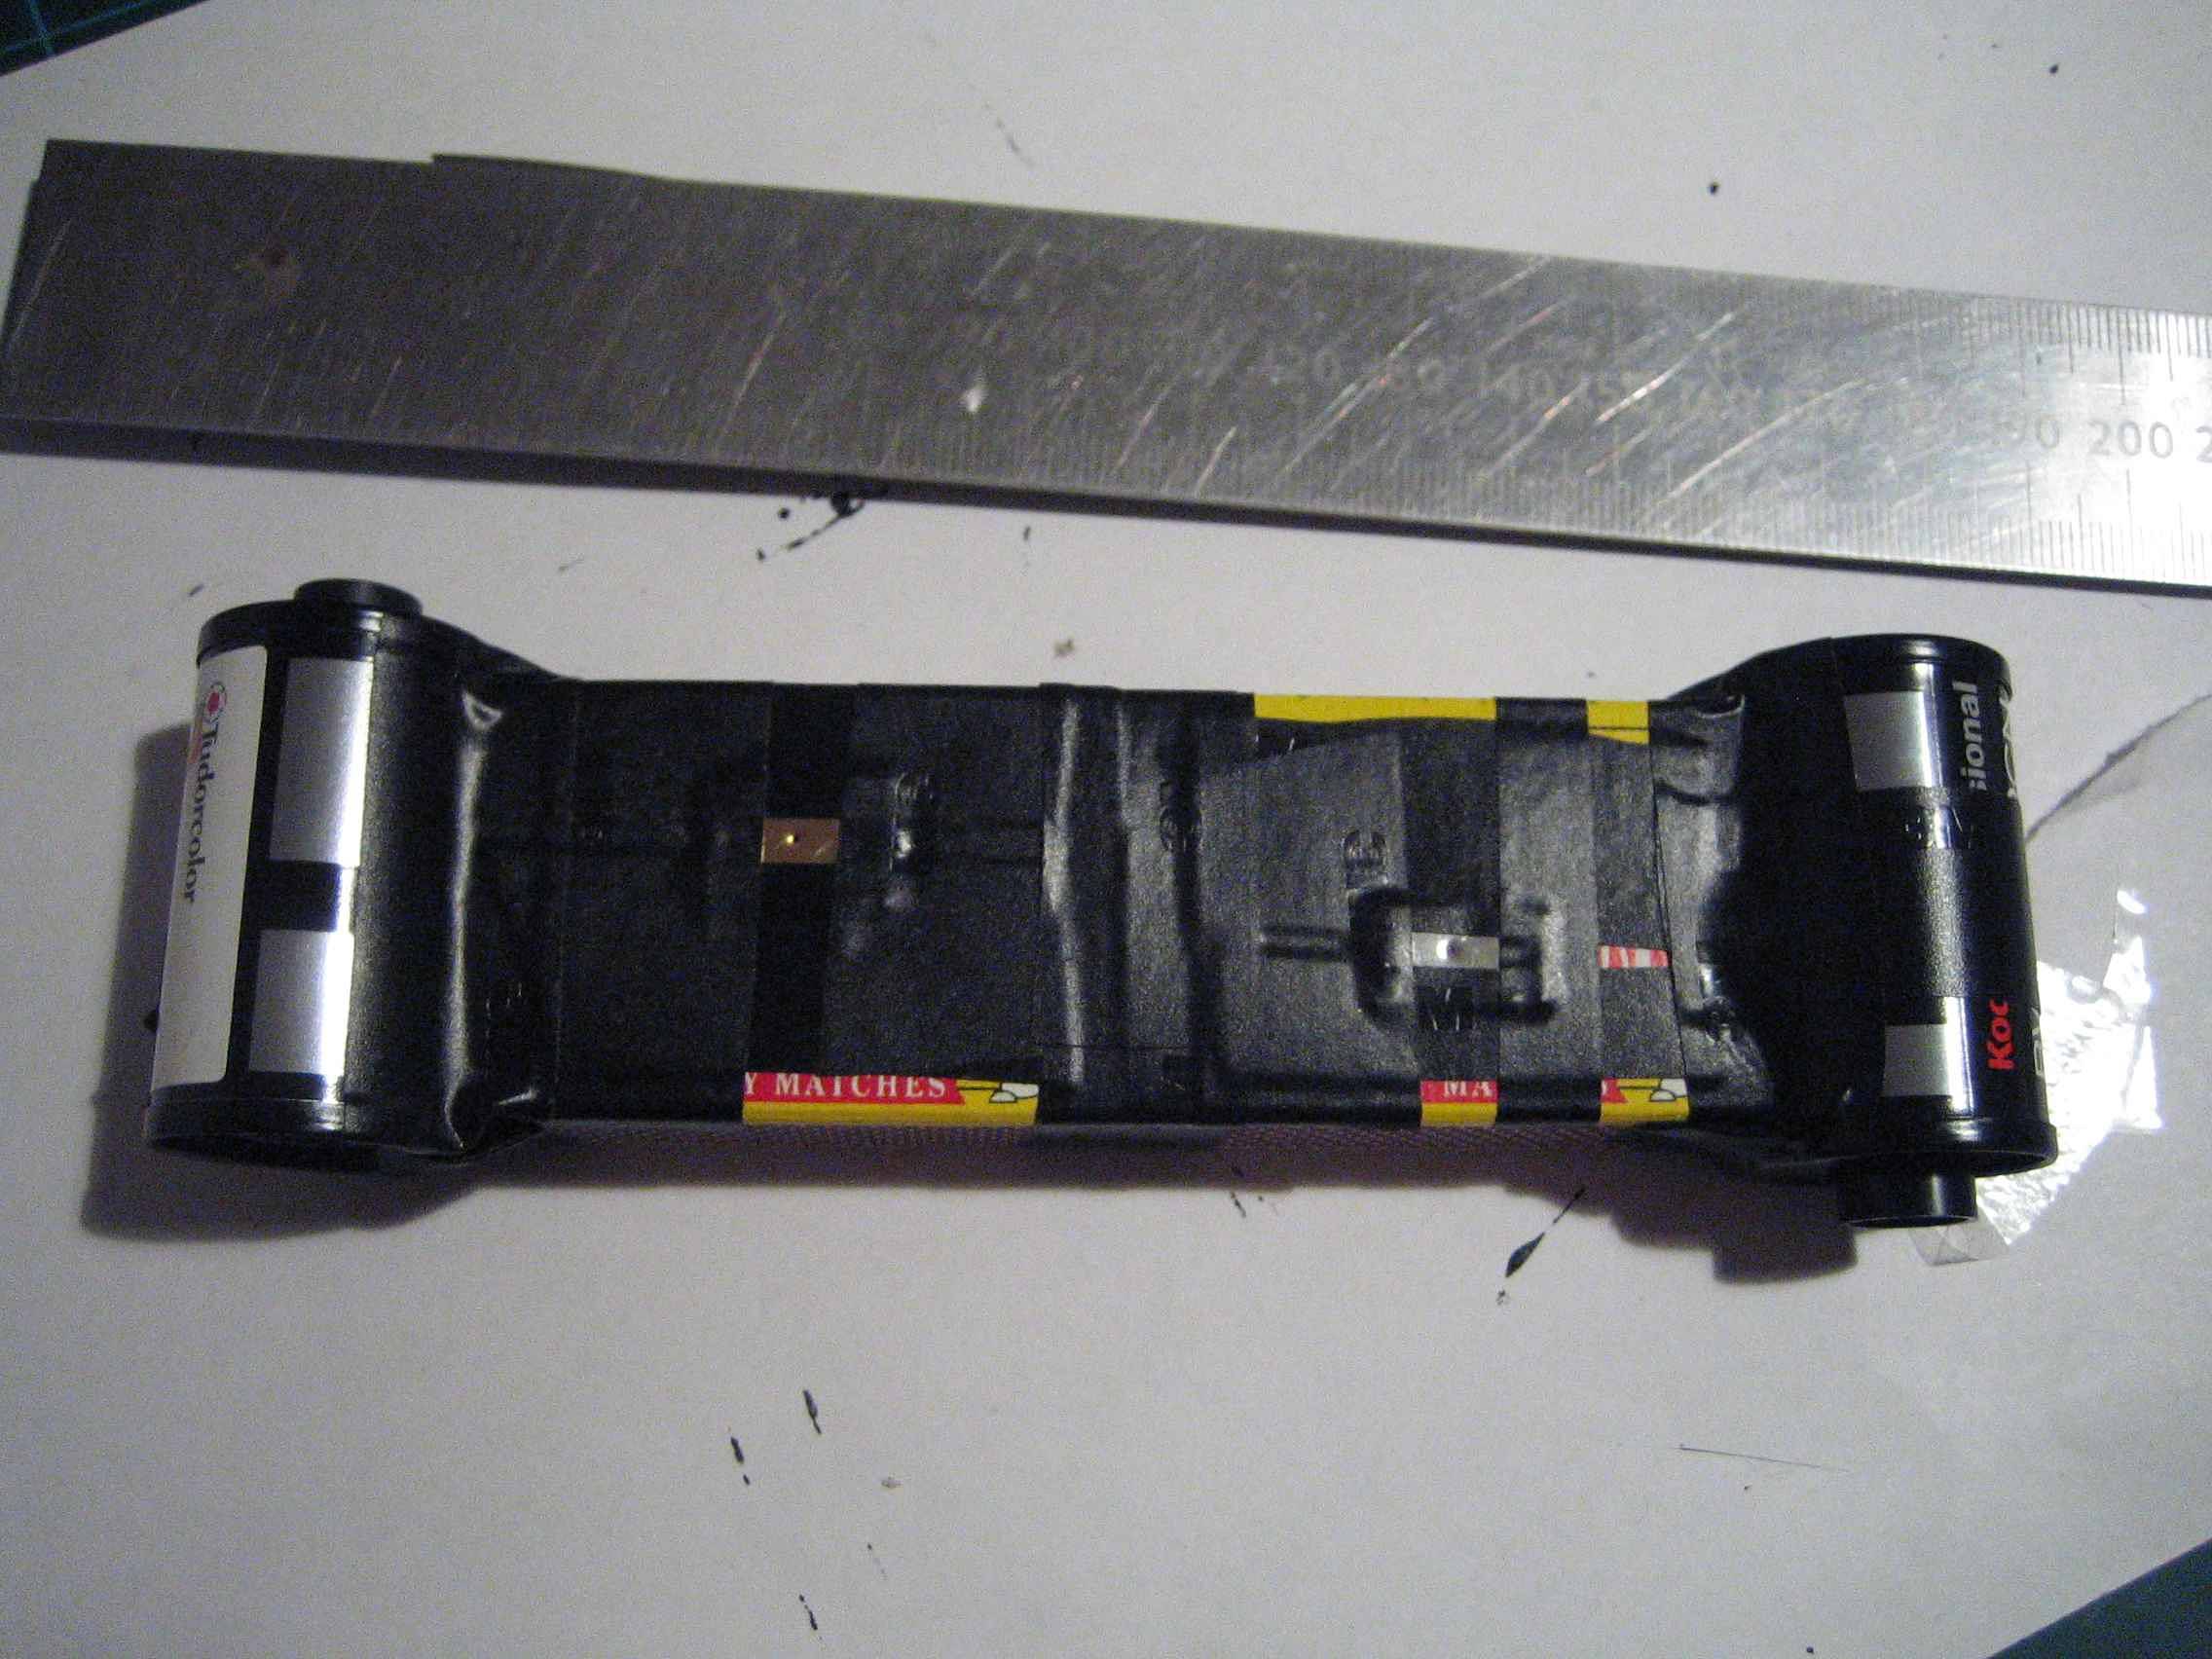
9.Join the two matchboxes together with tape and insert your trays with the masks cut. The film is then slotted in behind the trays.
This will keep the film nice and flat. pull the leader of the film through until it shows out the other side.

10.What you now do is attach your film to the end of a ‘dead’ cartidge. Just use some black tape or sellotape, make sure it doesn’t stick and the film runs freely.
Once attached, wind on a bit and pull the cartridge as close to the box as possible as it needs to be taped up tight to hold it on and stop light leaks.

11.It should be nice and secure like this. It’s not the most attractive solution but it works!
12.Once both are done it should look like this.
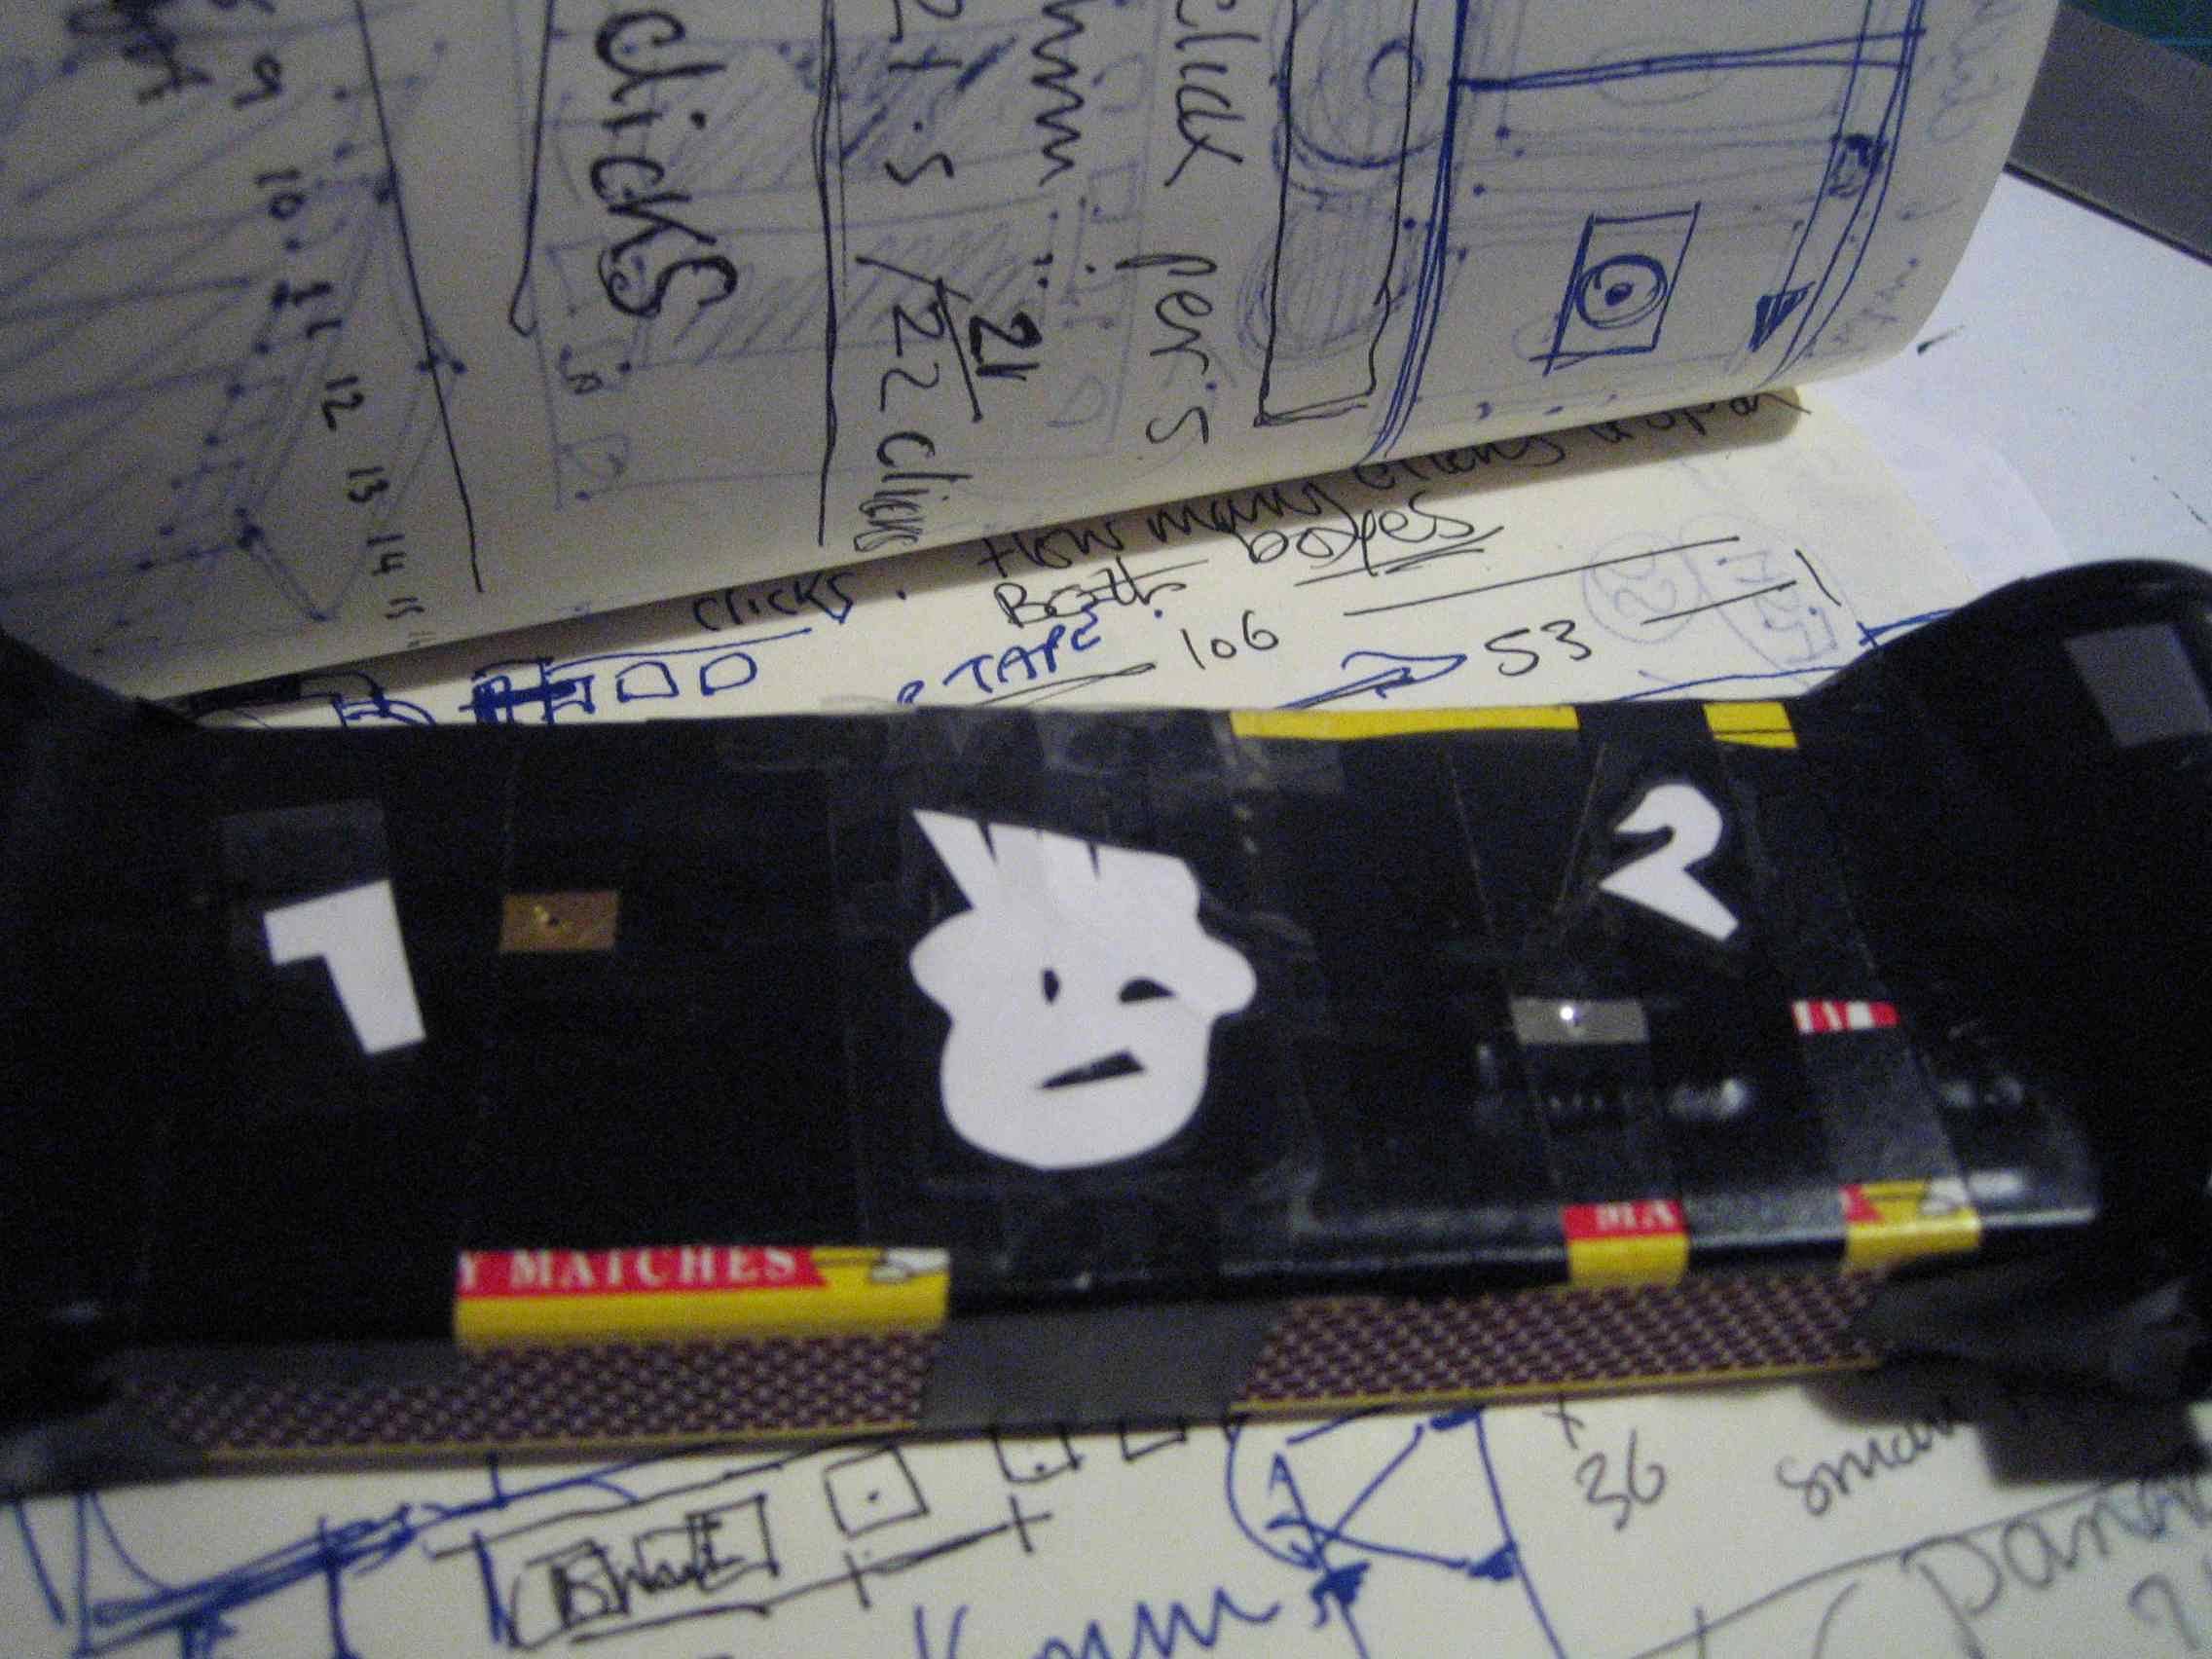
13.Now you can number them if you want to or add decals for fun.

14.Just to remind yourself which way you are going.
15.Shutters are needed to keep the light off the film. so the simplest method is black tape folded back on itself or a small piece of card slotted in front as you can see here.
I had pulls made from string.

16.The back of this is long enough to make tiny notes on exposure times, especially for the first roll until you have an idea of what you are getting from this cam. There is even enough room for a pencil! Lolly sticks can be cut down and slotted in the cartridges to turn the film.
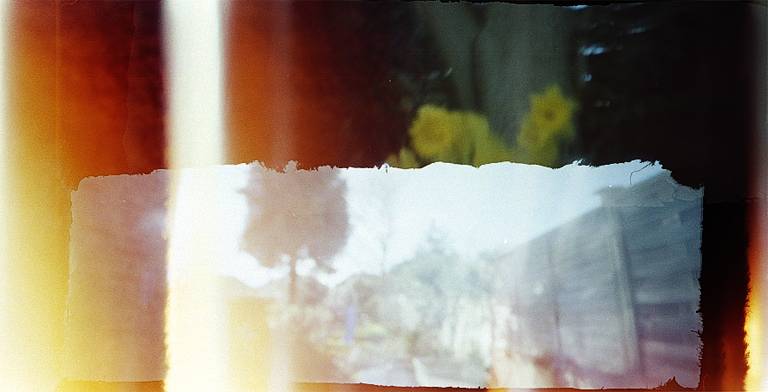
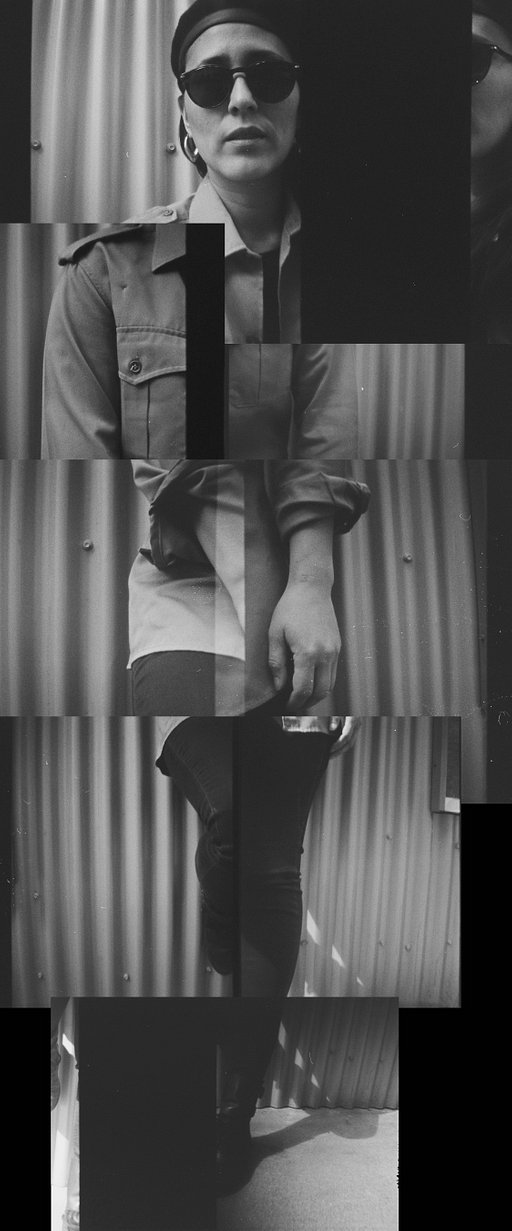
There you have it. Below are some images from this cam.


written by kylewis on 2011-04-23 #gear #tutorials #diy #pinhole #pinhole-photography #tipster #kylewis #do-it-yourself #requested-tipster-pinhole #pinhole-masters-and-magic


5 Comments