The passage...

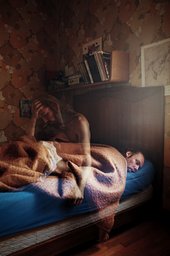
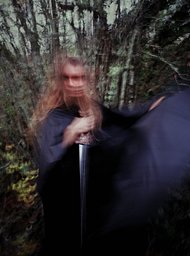
First try with a Splitzer (homemade), yay ! I tried this technique a few years ago, just using my hand to block half of the frame but they were just snaps and did not yield anything interesting. After seeing a lot examples here, and especially from Yoshitaka Goto, I was inspired to create something more thought-through. When I do multiple exposures/conceptual stuff, I usually shoot a dozen or so of frames (and many more clicks) because each really turn differently and I want to have a broad choice of photos to pick from. Here, since the locations for top and bottom part of image were not the same (15mn drive, not that bad) I used a couple of tricks to get more photos out of one travel. First, I used two different cameras and shot half a frame in the room with one camera then another one with the second camera. Then I went to the pond with both cameras and completed the bottom of the frames in them. Still at the pond, the second trick is that I then advanced the film on both camera and shot the bottom part of a new frame. Then I went back to the room and shot the upper part. That's four final photos for one travel. I ended up doing another run the next day and ended up with 8 photos to choose from. Splitzers seem to be somewhat rare on the second-hand market and they are expensive to buy brand new so I made my own with a soft-ish plastic cap that was lying around. I just cut it in half with scissors. I did not cut exactly in the middle so one half is a bit larger than the other and the edge is curved. I've noticed that with a separation exactly in the middle of the front of the lens, you can see more than half the photo in the viewfinder, as if the light is bending. It means that upper and bottom part will not just be put next to one-another but will overlap in the center and merge nicely. I guess I could use the big or small half of the cap to play with the amount of overlapping. I wanted to keep the same perspective in both part of the image to get a realistic rendering. You'd have to stick with the same focal length and 24mm was used for the top part but since it's a bit tricky/wide to handle I used a 28mm for the bottom part. The small difference shouldn't be too detrimental. I also made sure to use a similar angle (from eye level) to shoot both part and again ensure a realistic effect. Also since the time allowed by the self-timer was a bit short to jump in the bed, arrange the blanket and get in the desired position, I used and external mechanical self-timer that I initially got for my P67. Coupled with the use of the self-timer, it allowed me more than double the time to set things up.

Photographer:
sylvestre_le_chat
Uploaded:
2017-04-05
Camera:
chinon cx
Film:
Kodak Gold 200 Expired
Lens:
Fuji 24mm and Takumar 28mm
Albums:
Conceptual

10 Comments

  1. schwarzesauge
    schwarzesauge ·

    Great!

  2. ivaylo
    ivaylo ·

    That's solid!

  3. honeygrahams224
    honeygrahams224 ·

    Awesome job!

  4. why-yu
    why-yu ·

    incredible :)

  5. liaye
    liaye ·

    incredible good!!

  6. michellymatias
    michellymatias ·

    You are incredible!!!

  7. iremben
    iremben ·

    love it, so clever <3

  8. ssmokingcamera
    ssmokingcamera ·

    WOW!!!!!!!!!!

  9. gandhar
    gandhar ·

    This is too good!

  10. olgove_e
    olgove_e ·

    Wow! That's really cool!

More photos by sylvestre_le_chat