Let Your Creativity Show in an Instax!
22 Share TweetPush the Fuji Instax Mini 8 to its creative limits! Learn how to let your Lomographs shine for all the world to see in your instant prints. Depending on your inspiration, most of these manipulations can be done “in an Instax.”
Most Lomographers use the Fuji Instax Mini 8 camera for snapping rich, vibrant, colorful, candid party shots. And this reincarnation of the Polaroid “instant” success story is the king for achieving this goal. But there’s more to this point-and-shoot instant classic than meets the eye. But you won’t find this hidden magic in any “official” instruction manual. Rather, these tips are “hidden” right in your hand, because you can do each of these creative techniques “in an Instax
Believe it or not, a nameless big-time book publisher signed a contact with me for disclosing these tips in a book that would be dedicated to the Fuji Instax. Oddly enough, after I demonstrated the real potential that is locked inside the Instax to the publisher, he balked at the book idea and canceled the contract. The reason behind this sudden change: the camera is “awful” and you can’t do “anything with it!”
WOW, was he wrong. Well, you be the judge. Here are three fun tips for helping you to expand your creative horizon.

1) Photomontage
This is the easiest of all creative techniques that you can do with the Instax.
- Parts:
fabric scraps
coins
colored plastic
magazine lifts
negatives
a pair of dark sunglasses – no, really
- Difficulty: Easy
Darkroom Required

Step 1. Gather your parts and take them, along with your Fuji Instax Mini 8 camera and Instax film pack, inside your darkroom.
Step 2. Load the film pack and eject the protective black cover.
Step 3. Turn off the lights. Lay the film pack, film side UP, on a flat surface. Arrange your parts on top of the film.
Step 4. Turn on the Fuji camera, arrange one lens of your sunglasses over the camera’s flash bulb, point the camera at the ceiling, and pull the trigger. The flash will fire and the camera will whirl likes it’s going to eject some film; don’t worry the film pack isn’t inside the camera, yet.
Step 5. Remove your parts from the top of the film pack and load the film back into the camera.
Step 6. Turn on the camera, put your hand over the lens to prevent light from ruining your photomontage and push the shutter release. The flash will fire and the camera will eject and develop your photomontage print.
Step 7. Get creative and push the envelope.


2) Image Manipulation
This technique can be dangerous, especially if you break the film’s seal and squeeze some of the caustic developer out of its protective envelope.
- Parts:
plastic ink pen
toothpick
- Difficulty: Moderate
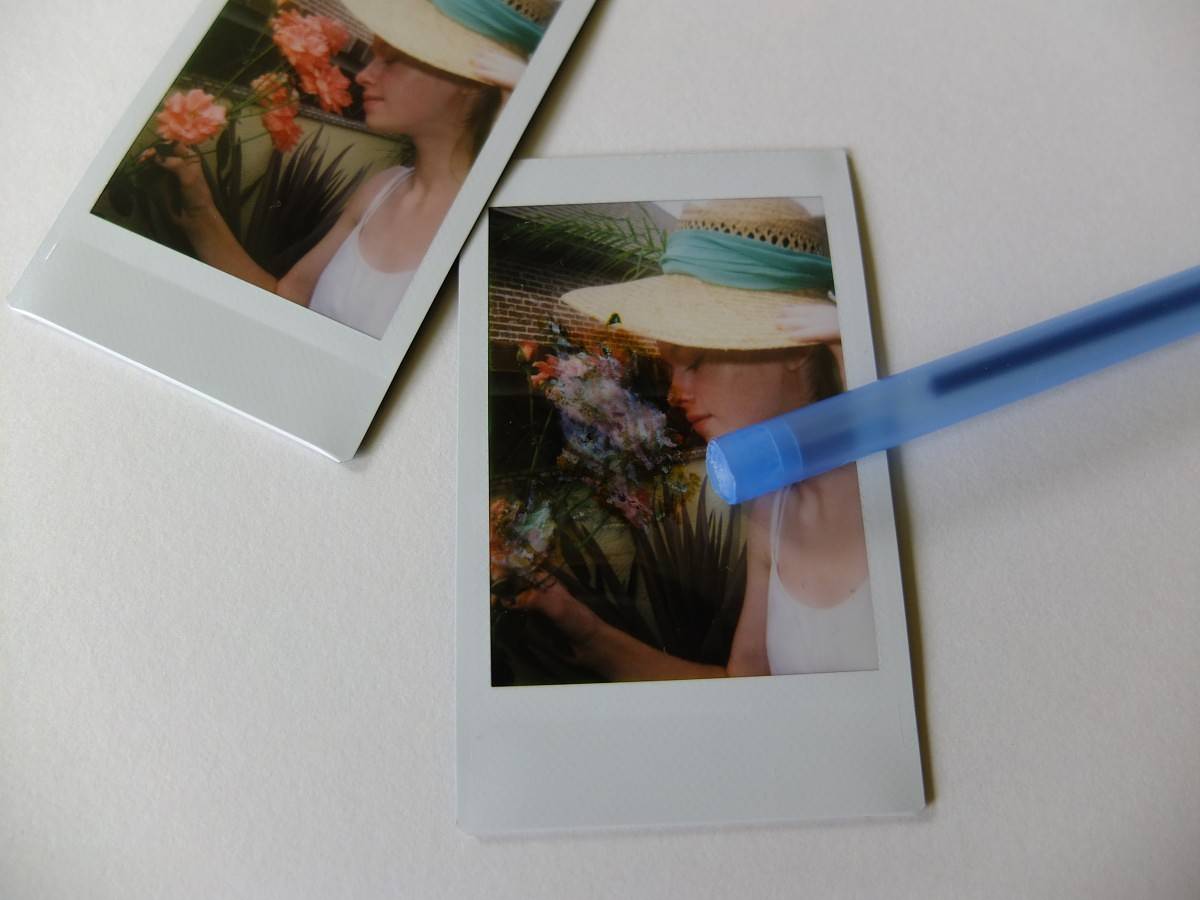
Step 1. Take a “typical” or “standard” photograph.
Step 2. While the print is developing, use your parts for pushing, edging, burnishing, and removing bits of the image’s dyes before the print has chemically finished developing.
Step 3. Make sure that you don’t puncture the print during this physical manipulation process.
Step 4. Change colors, highlight shadows, and alter shapes all with a push here and scrape there.


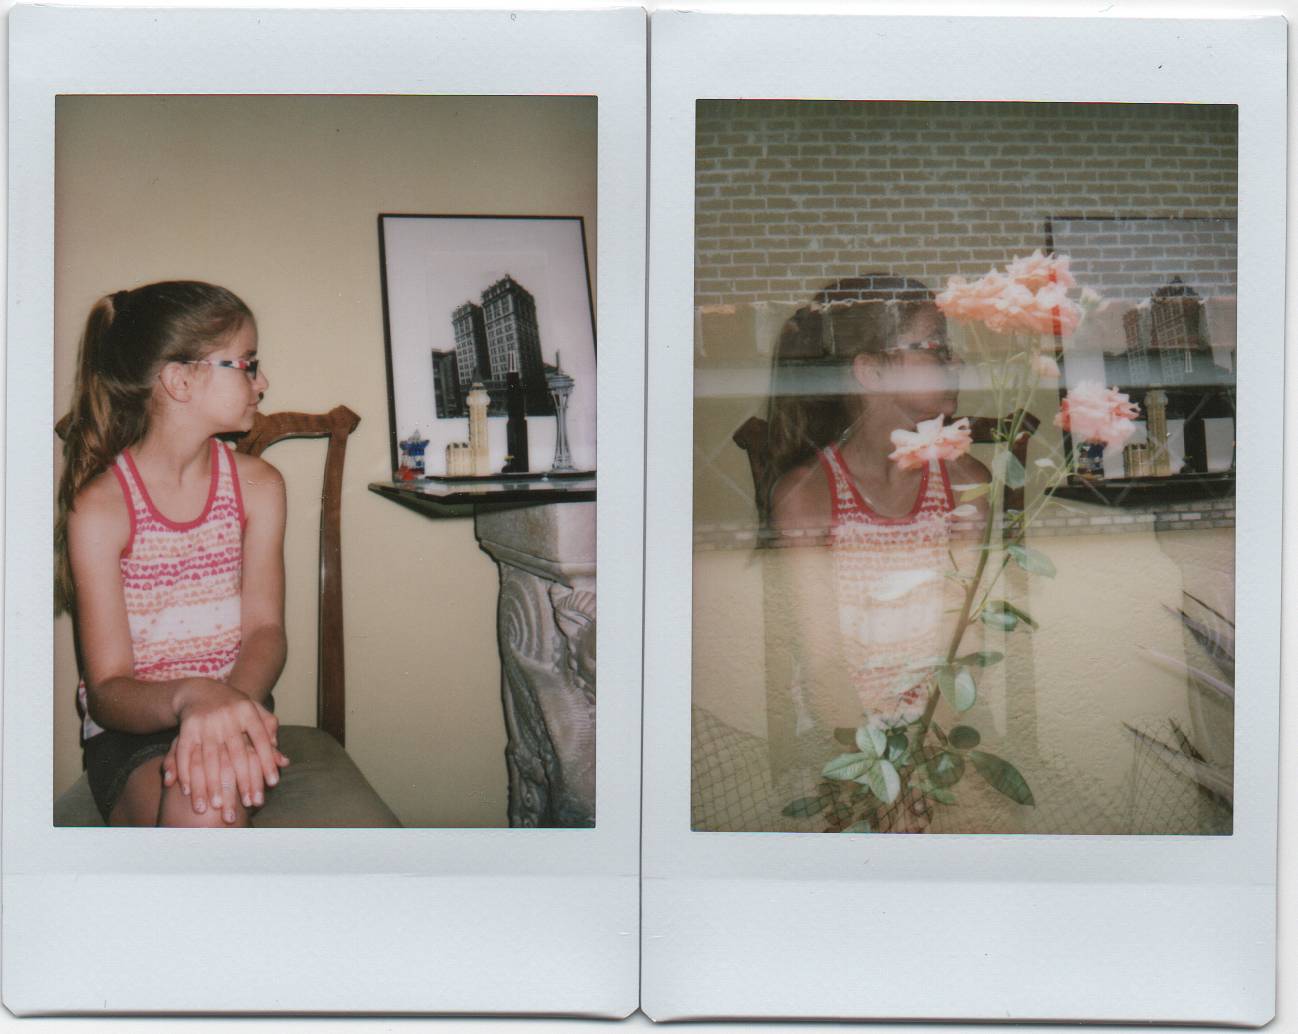
3) Double Exposure
If you are reckless in handling the Instax film cassette, you could jam the Fuji motor and ruin the camera.
- Parts:
tulle fabric
- Difficulty: Advanced
This tip requires that you fix the Instax film pack so that the print can’t be ejected when the camera’s shutter release is pressed. The easiest and safest way to prevent this print ejection is by wrapping the film pack’s top with tulle fabric.
Darkroom Required
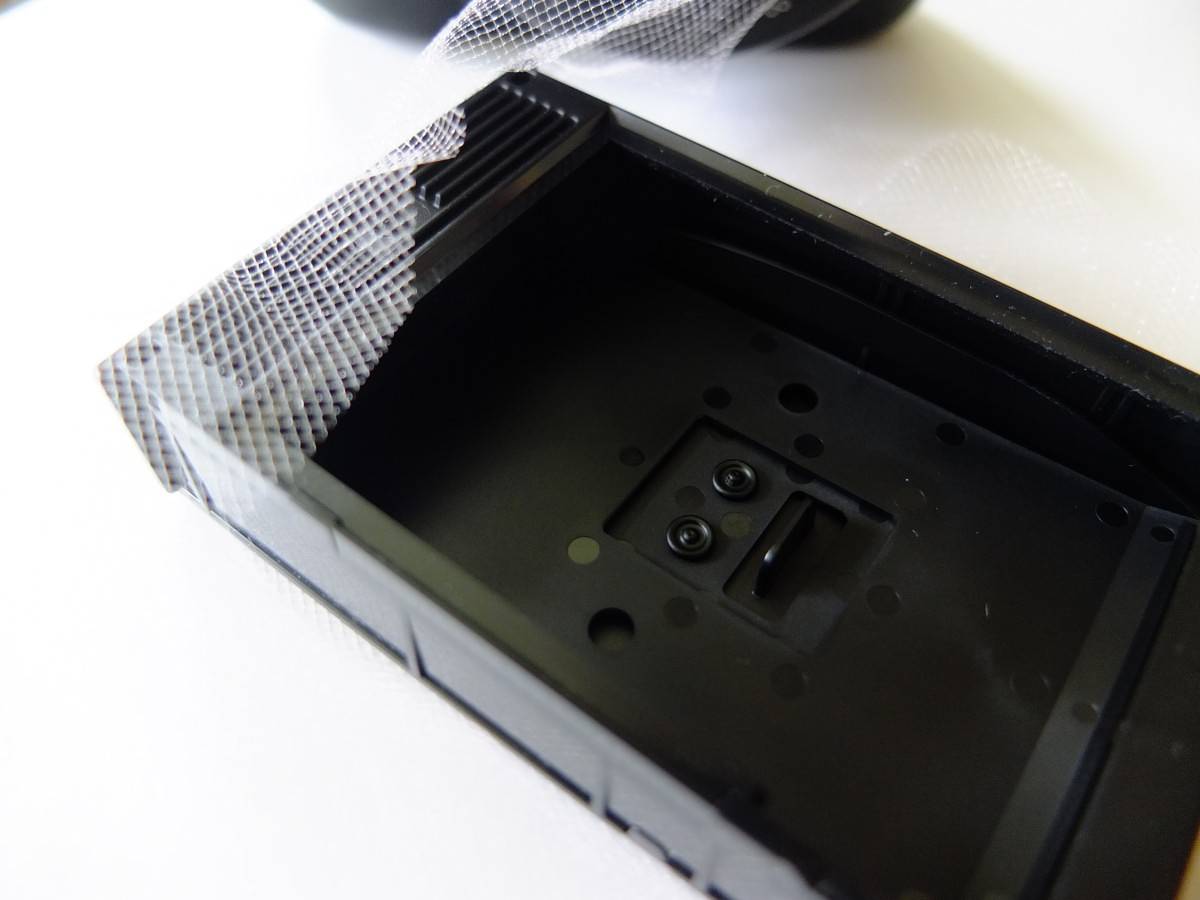

Step 1. Enter your darkroom with the Fuji camera, Instax film pack, and tulle fabric. Insert the film pack and eject the protective dark film cover.
Step 2. Turn off the lights, open the camera, and remove the film pack. Carefully wrap the fabric around the entire top of the film pack. Slowly insert the pack back into the camera and snap the back closed.
Step 3. Make your first exposure. In double exposing Instax film, each exposure is cumulative and top layers or the last exposure can overpower the first exposure. Therefore, make your first exposure bright with full flash. The camera will attempt to eject the print following this exposure, but the tulle fabric should hold it tight.
Step 4. Return to your darkroom and turn off the lights. Open the camera, remove the film pack, and take the tulle fabric off the top of the pack. During the exposure in Step 3, some of the tulle might have been sucked up into the camera’s top ejection slot. Gently pull this fabric out and discard it. Don’t try to reuse torn tulle fabric or you could jam the camera. Put the film pack back inside the camera and close the back door.
Step 5. Make your second exposure. This second shot should have the camera’s flash obscured. Hold your finger over the flash and press the shutter release. The double exposed print should eject properly and begin its development.

Remember the Fuji Instax film is exposed upside down inside the camera. Therefore, your creative compositions should be arranged along the “wide” bottom edge of the film pack.


In addition to being a wonderful snapshot maker, the Fuji Instax Mini 8 can also be a real creative genius. As these three tips illustrate, you can push this little camera around and make some really interesting photographic expressions. Now let those creative good times roll.
The Fuji Instax Mini 8 makes instant photography super fun! This camera boasts simple operations and comes in an array of candy colors. Brighten up your mood by shooting with the Fuji Instax Mini 8 Yellow! See our array of instant cameras and film at the Online Shop!
written by themindseye on 2013-08-02 #gear #tutorials #instax #camera #tutorial #mx #tipster #manipulation #fuji-instax #double-exposure #fuji #photomontage #mini-8


No Comments