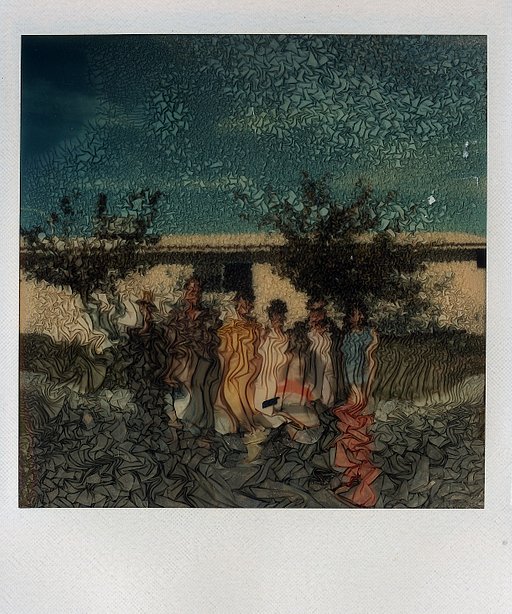
Lomo LC-A Instant Back+ Ruined Effect!
16 42 Share Tweethave you ever been curious how to make those gritty, lo-fi, “ruined” instant photos? Well, there’s no need for photoshop if you know Ron Lau of Lomography Hong Kong’s secret tipster on doing it right!

Want to know how to make these beautifully “ruined” Instax photos? Here’s what you need to get started:
1. Get your LOMO LC-A Instant Back+ ready!

2. Take a shot with your LC-A Instant Back+ as usual.

3. Eject and make the unpredictable ruined effect – bend/grip/squeeze your film immediately when the film is coming out!

You will get random flow marks, light leaks marks, burn marks on your Instax Mini Film if you bend/squeeze it right after it comes out. The marks and pattern will depend on the way you bend and squeeze your film. Usually heavy bending makes flow and burn marks,and squeezing makes “light leak” marks, try to explore your own favored manner for the unlimited ruined effects!
How the trick works:
Actually It’s all about the mechanism how the Instax Mini film develops. Following is the way how Instax Mini film works normally:
1. Film sitting in the chamber, camera shutter opens, film exposed.
2. Film being ejected by the Instant back, film passing through a pair of rollers inside the Instant Back and coming out.
3. The rollers press the chemical pack of the Instax mini film (the thick white border) and spreading the chemical on the film evenly.
4. The chemical getting dry and developed/colored the film and you see the image.
Actually what we did on the “ruined Instax” is to not let the chemical spread evenly on the film. Thus, flow marks of the chemicals will be visible on the image when it comes out; and the area with very thin chemical at the edge will appear as the “light leak” pattern.

Some tips for bending/squeezing
- Bend/squeeze the film right after it’s being ejected ~ to flow the chemical before it dry.
- If you squeeze the film too hard, chemicals may leaks on the back of the film. Preparing a tissue when you play with the trick makes it easier to get away from the mess you may have on your hands.
- You may bend the film repeatedly by “waving it”.
- You may squeeze the film like a paper ball.
- You may do anything you want on the film!
written by cruzron on 2010-03-29 #gear #tutorials #instant #light-leak #tipster #ruined #bend #lca #lomo-lca-instant-back #ron-lau #lc-a-top-tipster #top-lc-a-tipster


16 Comments