Lasergrams on Fuji Instax
2 21 Share TweetHere’s a variety of experimental techniques you can try using Fuji Instax film and a laser pointer!

In order to create these types of images, you’ll need to go into a dark room with no light, a bathroom without windows, a closet, or something similar. Before turning off the lights, set up your area with any materials you’ll want to use and a light source like a laser pointer or LED toy light for exposing the images. After making sure your area is ready, turn off the lights and make sure the area is in complete darkness.
You will then take the film cartridge out of the camera (with the Fuji Instax, if starting a new pack, you’ll need to clear the black slip first) and put it flat on your workspace with the film exposed towards you. You should be able to feel the difference in the dark.
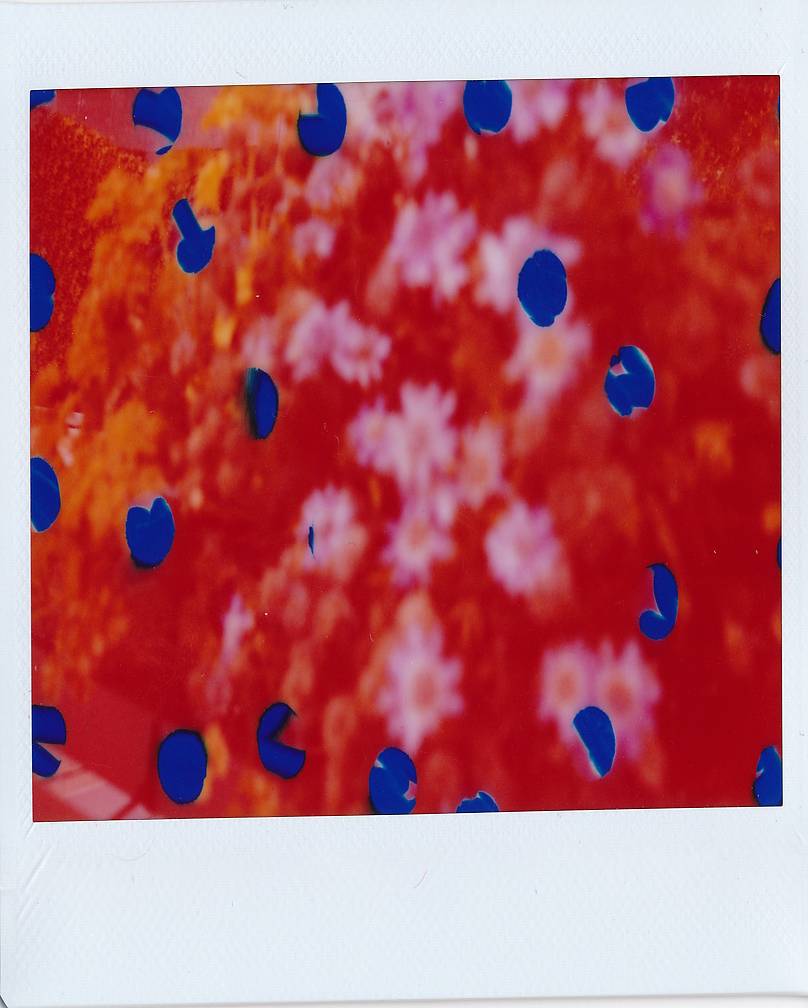


When creating a stencil image, you will need to use a thick piece of paper and cut out the design you want. Put the stencil on top of the cartridge which should be lying flat. Use the later pointer to expose the areas that are open. I used a red laser pointer which turned the areas I exposed the most a dark blue, and affected the surrounding areas with a red tint.
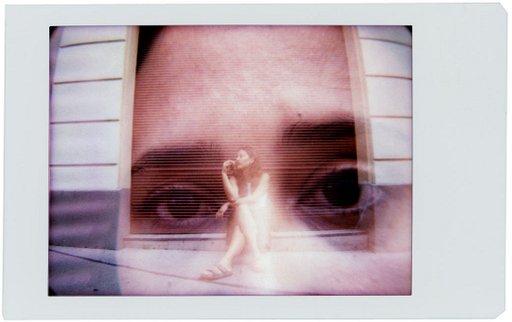
After you’ve drawn in the areas you want, put the cartridge back into the camera. You’ll need to make sure you put it back in the right way which may take a few tries. If you only want the stencil image to come out, turn the camera on and cover the lens, then hit the shutter button and it will pop out your image. If you want to do a double exposure image then after putting the cartridge back in, instead of covering the lens, go ahead and take an image of what you want.


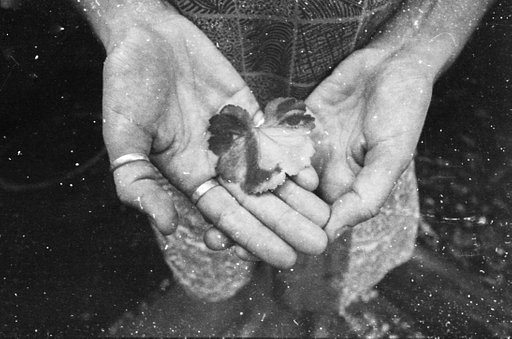
I took the stencil idea a step further and decided to try a photogram with an old glass negative. The entire process is basically the same except instead of putting a piece of paper over the cartridge, I put the glass negative on top. It’s slightly harder to differentiate what you are exposing in the dark with a negative so try and learn your negative well before going in the dark. Using the laser pointer, draw in the negative just like the stencil. With the negative, the results will be different than the stencil because the image won’t be exposed evenly, which creates a unique effect.


More Tips:
- If you write with the laser pointer the text will come out backwards.
- Depending on the direction you lay the cartridge will effect the way the stencil comes out (upside down).
- Exposure time varies but for the dark blue color it only takes a few seconds, if the area starts turning white you’re overexposing the image.
The Fuji Instax 210 Wide is your jumbo-bodied buddy for super-wide instant pictures. Your photos give off that nice retro-coloured finish, and its built-in flash makes it great for parties and nighttime, and indoor shots. Check it out with the rest of our Instant cameras here!
written by michelle-asci on 2013-07-10 #gear #tutorials #art #experimental #instax #stencil #tipster #instant-photography #instant-film #fuji-instax #polaroid #fuji #photogram #laser-pointer


2 Comments