A Simple Guide to Making a Panograph
16 87 Share TweetPanographs are simple and fun and there’s a only a few guidelines to remember when making these stunning images.

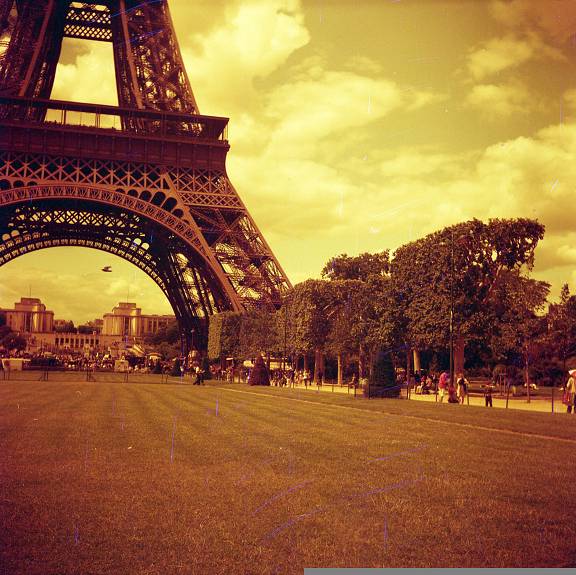
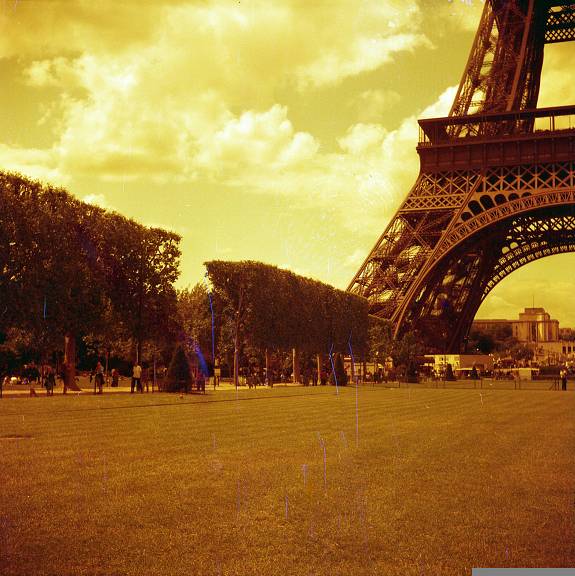
A panograph is assembled from several overlapping photographs. In this tipster I shot an entire roll of Lomography Redscale 120 film in a Lubitel 2 and placed the resulting 12 photographs together to make one collective image.
My subject was the Eiffel Tower in Paris.
First thing to do is find a good place to stand to take your pictures. As the Eiffel Tower is quite a tall structure I was a good distance from the base but still close enough to ensure that my images would overlap.
Secondly, set your aperture and exposure. Do not change these settings throughout the process to ensure the best results in the final panograph. Note: In this panograph, as I shot higher, other colours in the redscale film came out as the film was overexposed as I moved towards the sky. This is because I had exposed for the base of the tower and not the sky which resulted in the colour change throughout the panograph, which I think adds a nice effect.
Thirdly, Shoot…move a little…shoot…move a little..shoot…move a little…(repeat as necessary).


The best part comes next. When you have your prints collected from the lab, assemble them to make your panograph. If you shot so that you have a large amount of overlapping in your photos you will probably be able to arrange the photos in a few different ways to make your panograph.
Finally, there are three ways to share your panograph online:
1. Take a photograph of it.
2. If the finished panograh can fit on a scanner then scan it.
3. Use picture editing software, like Photoshop, When you have your film scanned bring each photograph in as a layer and assemble the panograph on the computer save it as a Jpeg and share your masterpiece with the world.
The Lubitel 2 is an attention-seeker—from its top-down viewer, down to its stylish, black, metal body. Its signature Triplet T22 lens yields charming and distinctive medium format shots. Get your own Lubitel 2 now!
Load up the Lomography Redscale 120 100 ISO and achieve the warm-tinged effect produced only by exposing the negative on the reverse side! You’ll get breathtaking square shots evoking intensely warm, honey hues. See our selection of Lomography films here.
written by homer on 2011-11-11 #gear #tutorials #art #medium-format #120 #redscale #lubitel #tipster #technique #tlr #panography #panagraph #photostich


16 Comments