Laserjet Transfer on Mixed Media Collage
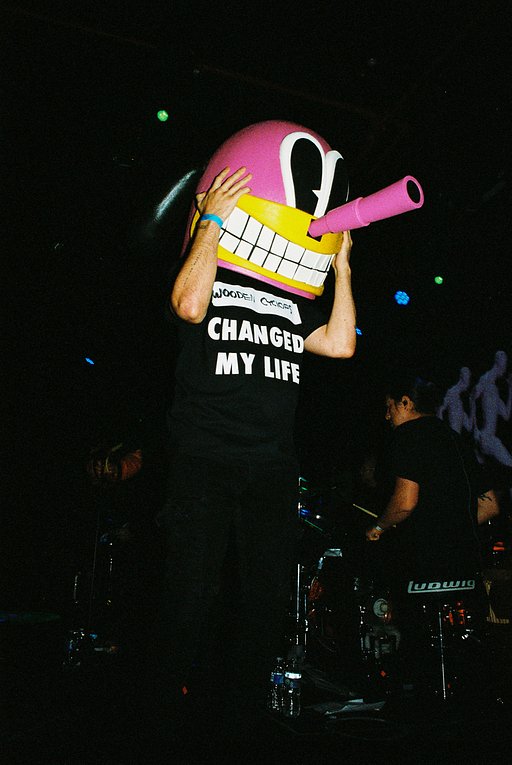
17 46 Share TweetI was looking for a new way to show my lomographs. I wanted to incorporate texture, mixed media, collaging and lots of contrast. I found laserjet transfers.
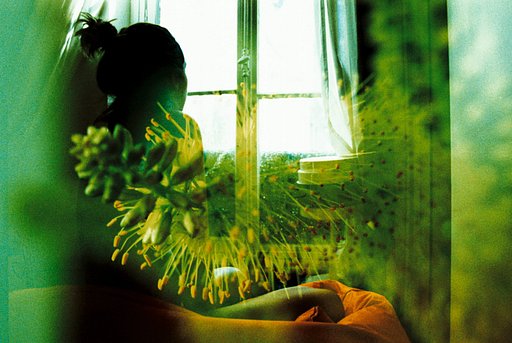
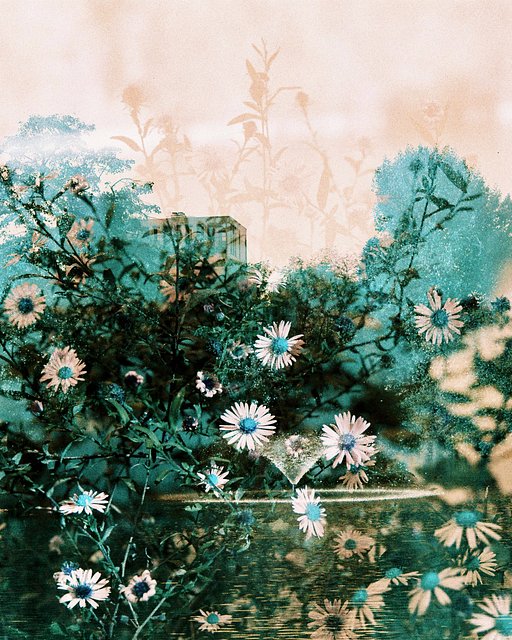
I was preparing to join a new art festival here in Cambodia called Art Explo. I wanted to feature some of my analogue photos, but wanted to do something different from framed prints or a LomoWall. I wanted to create something that involved a variety of textures and materials, but still highlighted the analogue nature of my photography. I decided to transfer my lomographs onto mixed media collages and textured surfaces and below is the final product.

There is a wide variety of methods that can be used to make image transfers. In this tipster, I’m going to explain the process I used to make transfers onto a canvas with a mixed media collage using materials available in most art supplies and hardware shops, including Phnom Penh where I live.
A bit of a warning here; this process takes a bit of patience and involves several steps.
Here is what you’ll need:
- canvas – any size or shape. I used a square 90×90cm canvas for this piece.
- collage materials. I used old newspapers, pages from textbooks and plastic feed sack material.
- laserjet printouts of the photo or photos you plan to transfer
- scissors
- white glue
- water
- wood varnish or painters varnish
- nail polish remover (acetone)
- spoon
- paint brushes
The first step is to prepare the canvas. You can apply paint or gesso or ink or any other material you like to add color or texture to the final image. To prepare my canvas, I cut and tore the newspapers, textbooks and feed sacks into pieces, then dipped those pieces into thin mixture of water and white glue until they were soaked. Then I covered the canvas with them, making sure to wrap the edge pieces all the way around the edge of the canvas. When the canvas was covered, I applied one last layer of the glue/water mixture with a paintbrush to make sure the pieces were firmly affixed.

After allowing the newspaper/collage layer (or paint or whatever other material you used to prepare the canvas) to dry completely, apply a layer of varnish. I used wood varnish because it’s all that was available in Cambodia. It had a yellowish hue to it which gave the final product an aged look. You may be able to find a more colorless varnish. After the first layer of varnish has dried completely, apply a second coat of varnish.
When the second coat of varnish has not yet dried completely, but is still tacky, it is time the laserjet prints of your photo(s).
Some tips for selecting and printing out your photos:
- Pick images with lots of contrast. This is one of the reasons lomographs are great for transfers. Plastic lenses and cross processed color shifts can provide some great extreme contrasts.
- When you transfer you image, the result will be a mirror image of the laserjet print. This means you need to flip your photo horizontally in photoshop or your transferred image will be backwards.
- Make sure you are getting laserjet printouts. Inkjet printouts can also be transferred using other methods, but, using this method, I only got good results with laserjet prints.
- You can use color or black and white printouts. I was only able to get black and white laserjet prints at my local copy shop here.
- Make sure the prints are made on regular paper, not photo paper. Remember, eventually you want to get rid of all the paper and leave only the ink of the image.
Cut or trim your laserjet image to the size and shape you want. Since my canvas was 90×90cm and I had decided to use one photo image, I needed to tile out my image into seperate pieces to be applied to the canvas. I did this with photoshop and then printed each piece of the image on an A3 size paper and then trim all the excess border space away.


While the second coat of varnish on the canvas is still tacky, apply your laserjet print(s) face-down on the part of the canvas you want the image transferred to. Use a spoon or your finger to smooth out any wrinkles or bubbles that appear in the paper.
After you’ve applied all your prints, wait 45 minutes to an hour to let the varnish finish drying. Then use a paintbrush to apply nail polish remover to the back of the prints. Again, smoth out any bubbles or wrinkles with a spoon or your finger.
After the nail polish remover dries (this takes only a few minutes), it is time to remove all the paper from the prints. Get some water in a bowl or a spray bottle and wet your fingers with it. Then gently rub the paper and it will begin to peel up layer by layer in little crumbs. Continue this process until virtually all the paper has been removed. This is the most difficult part of the process. If the ink image hasn’t set into the varnish or if you rub too hard, the image will tear. Working on this and several other large canvasses like this, I literally lost the figerprints on my thumb and forefinger!
When you’ve removed all the paper, the final image of your laserjet print will be bold in the foreground with the mixed media collage showing through the negative space in the print.
I’ve also had success using this process with mirrors, wood and plastic.


By the way, there is a much easier way to make transfers like this using Mod-Podge or gel medium. Neither of those materials are available in Cambodia, so I experimented until I found this method. If you’re interested in trying the Mod-Podge method, I suggest checking out Nitsa's blog Her blog is one of the places I found inspiration for this project and she’s a fellow lo-fi photographer.
written by tiro8 on 2012-01-13 #gear #tutorials #art #black-and-white #contrast #tutorial #texture #tipster #collage #holga-120n #olympus-om-2 #transfer #diana-mini #mixed-media #vivtar-uws


17 Comments